


Welcome to my DIY Food Photography Background Tutorial!
One of the most important elements of taking a great food photograph is having a background that really allows your culinary creations to be the star of your shots. The perfect background is one that adds contrast to your photos in terms of colour and texture, helps your photos to tell a story (where are you? A picnic? At Grandma’s old oak table?), and will give your photos a polished, professional look.
Now, I’m not a DIYer. I’m just not. I couldn’t hammer my way out of a paper bag. But if I can do this, you can do this! All you need is some time and some cheap supplies! I will be taking you through the (very simple!) steps to make your own ‘fake tables’.
I’ve made 6 of them, and they’re fantastic.
These backgrounds are stackable, perfect for fitting into closets, behind things, small spaces, the trunks of cars for portability (we move a lot, so being able to take these with us is a BIG plus!). They’re light and easy to move. They’re also reversible, so two backgrounds for the price of one! The different components are frequently on sale, and you might even have some of them lying around. However, they are thin boards that will not stand on their own. I put them on top of my (much) more boring table for pictures.
I am also not being paid or sponsored for any of the products listed below, they’re just what was available and worked well.
Let’s get started!
THE BREAKDOWN:
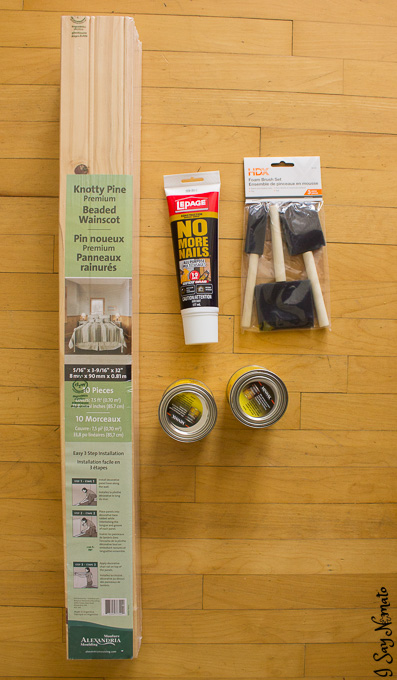
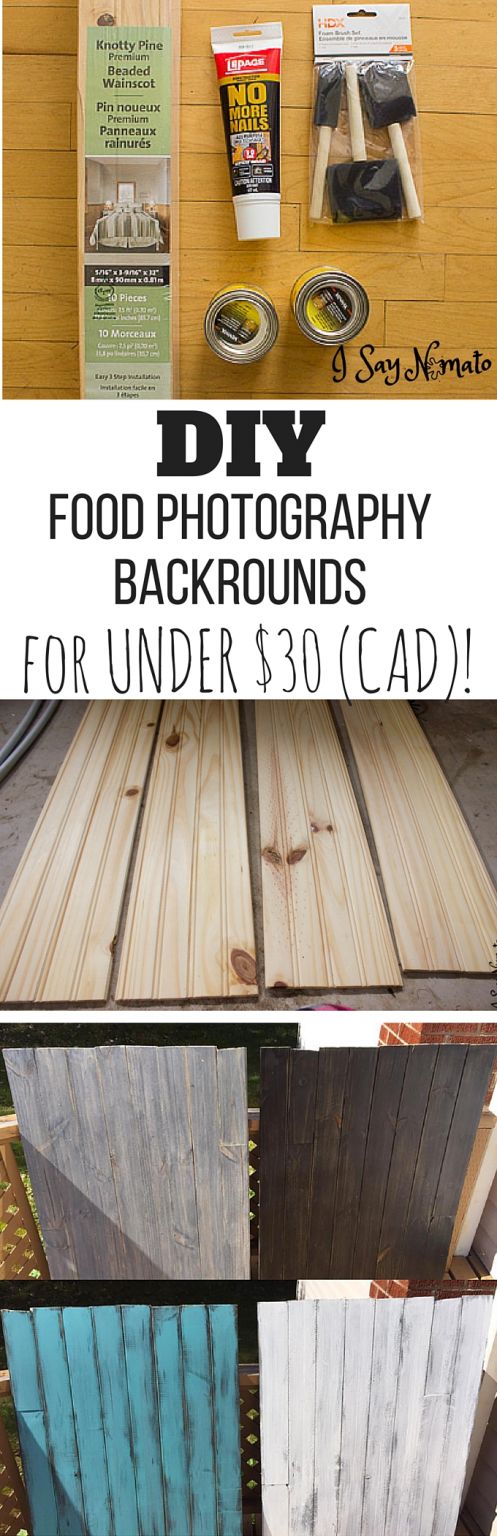
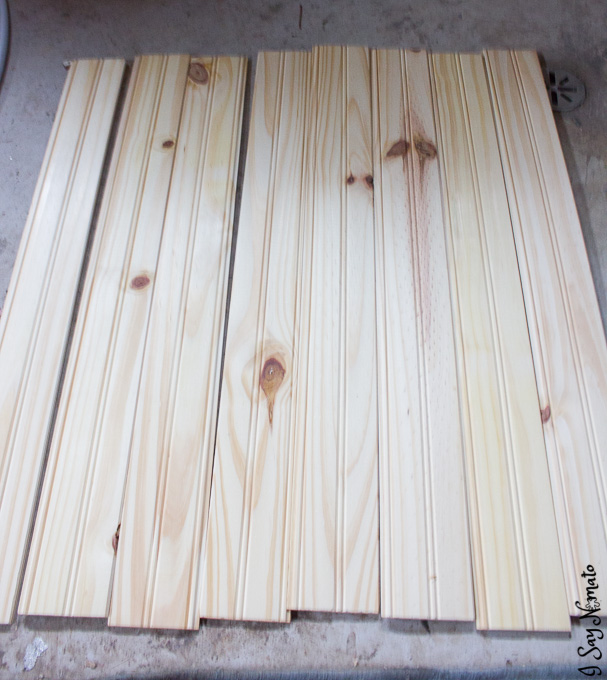
Wainscotting. This is the key ingredient to this whole thing. It’s thin, light, easy to work with, and soaks up stain and paint like a trooper. It’s interlocking, so assembly is easy and nail-free! Plus, you can usually find it pre-cut to 2 1/2 feet.
My previous boards I had to ask the extremely helpful people at the store to cut into 3 foot lengths for me, and they have turned out to be just a bit too long. You’ll probably end up with a couple extra slats, which is great because you can test your paints & stains, and pick the knottier, more interesting slats for the background.
($9.97 for 10 2.5′ x 4″ boards. Mine came in a pack of ten, and I used 8 of them)
Sample Sizes of Wood Stain and/or Paint. You will want a MATTE finish! Shiny boards will kick up a lot of unwanted reflection in your photos. I used Minwax wood finish, which occasionally goes on sale. This will probably be the most pricey part of your project, so make sure you get a colour you like, or can re-use since you’ll probably only need half a can at most for this project.
($8.57 CAD per 6oz. can. I used Minwax English Chestnut. Paint is much cheaper at ~$3.00 for a sample size tub)
LePage No More Nails All Purpose Clear Construction Adhesive. You can use any wood glue you want, really, this is just what was recommended to me (again, not a DIY’er!). I used only one tube for all three of my reversible fake tabletops so far, and still have some left over.
($7.47 CAD for a 177mL tube)
Paint Brushes – For stain, like in this tutorial, I recommend sponge brushes for heavy, even coverage. If you are planning on using paint with a weathered look, make sure you’ve got bristle brushes so you can see your brush strokes.
($1.99 CAD for a pack of 3 sponge brushes)
________
TOTAL: $28.00
BAM! Two bucks to spare!
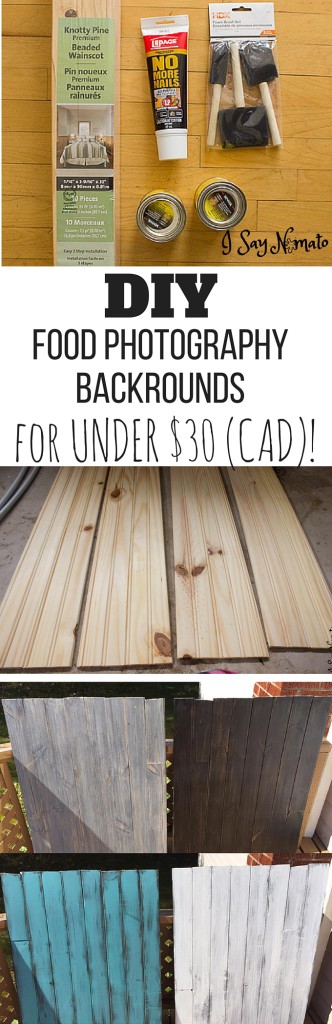
Step 1: Inspect and Arrange Your Wood.
Open your wainscotting and make sure it’s all in usable condition. Sometimes the interlocking pieces might be broken and that will make your job more difficult. Lay it all out and see which pieces are the most interesting, visually. For the pieces I’m staining, I LOVE anything with interesting grain, knots and bumps, while the painted ones can be a little more boring. I’m staining today, so knots it is!
Step 2: Glue!
You’ll want to put the glue into the ‘hole’ side of the interlocking pieces. This part can be pretty messy, so keep lots of paper towel or rags on hand. I used some Q-Tips to shove the glue more into the hole when it spilled out. (You know, like a pro. Don’t judge me.)
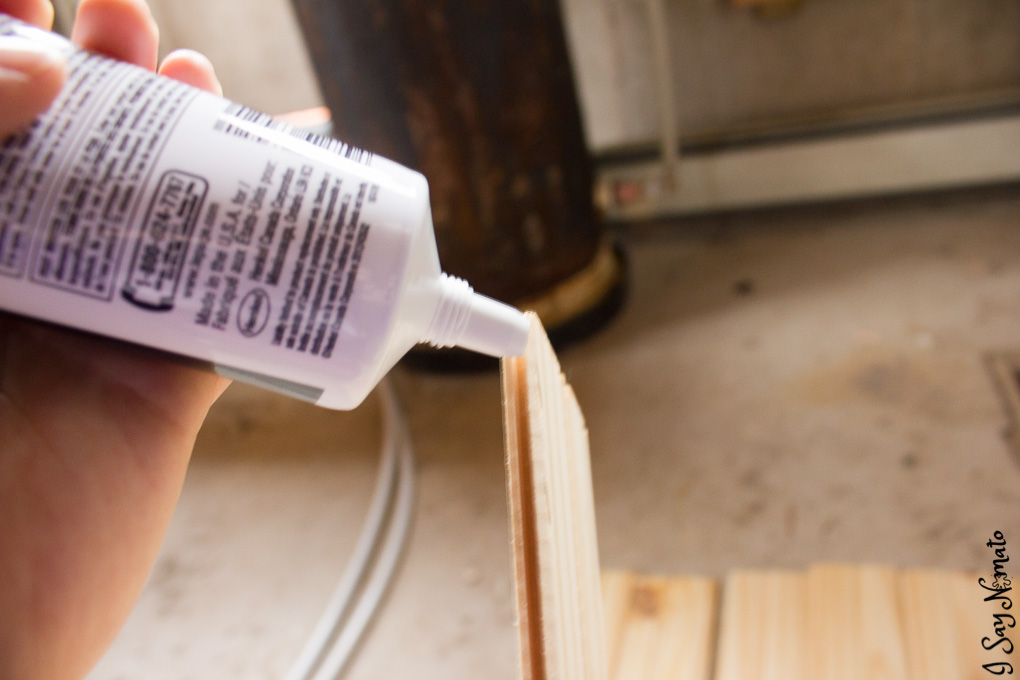
Fit the pieces together.
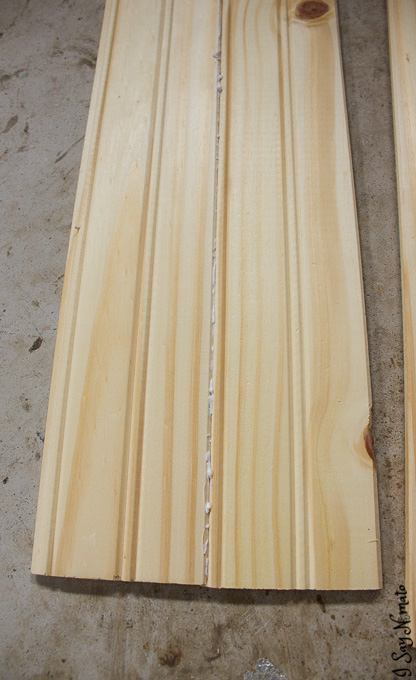
Oops, messy glue! Use a rag or paper towel and wipe that out. Any residual glue will resist the stain, so unless you want it to do that, be careful not to wipe it across the boards. (You’ll see what I mean later on). Don’t forget to clean up on the other side as well!
Do this for all your boards, gluing them and fitting them together.
All done!
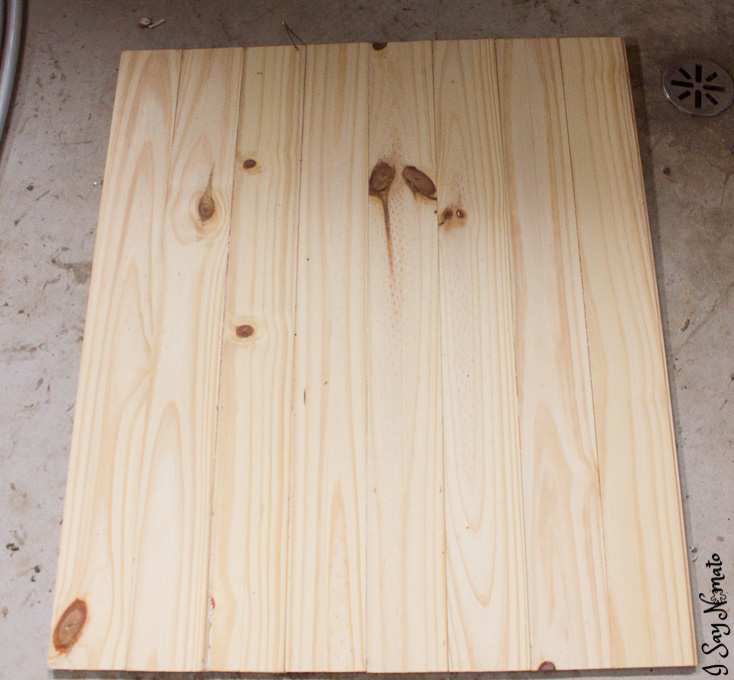
Now it has to dry completely, so put something heavy on it to keep it flat, and step away for at least 2 hours. If you don’t put something heavy on it, it will warp! (Yes, I am speaking from experience).
Step 3: Stain/Paint!
Just slather it on there.
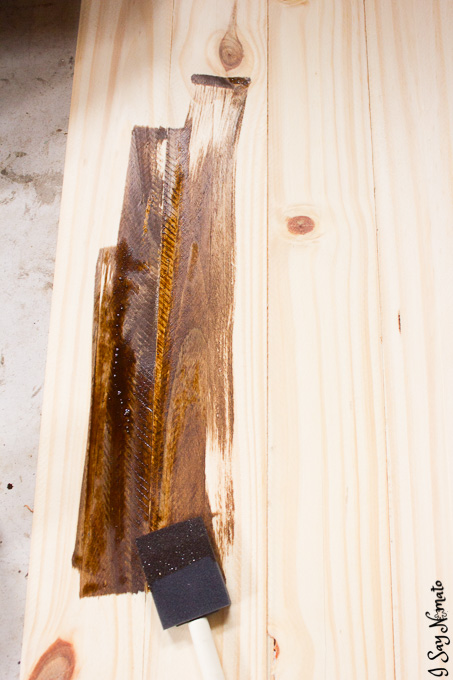
Minwax Finish in English Chestnut.
I’m only staining today. If you are painting, it is very easy to get a weathered look like this:
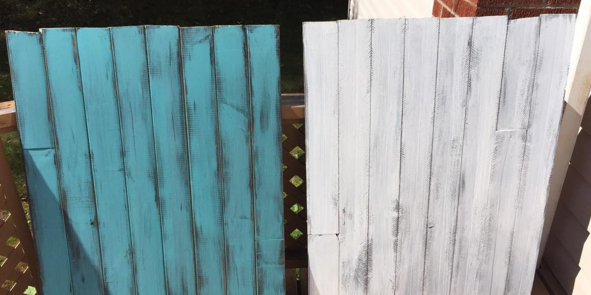
Behr Marquee MATTE ‘Bali Bliss’ on the left, and the whitest white I could find (that lost its tag, so I’m not sure what it is, sorry!) on the right.
Just stain it first, then slap some vaseline on any parts you want to keep paint-free, and then paint it one coat only in rough, broad strokes. Once the paint is dry, just go over the vaseline-d parts with a rag and it will come right off!
Now wait for it to dry. Give it a second coat if necessary. I LOVE the natural, uneven look two coats give it.
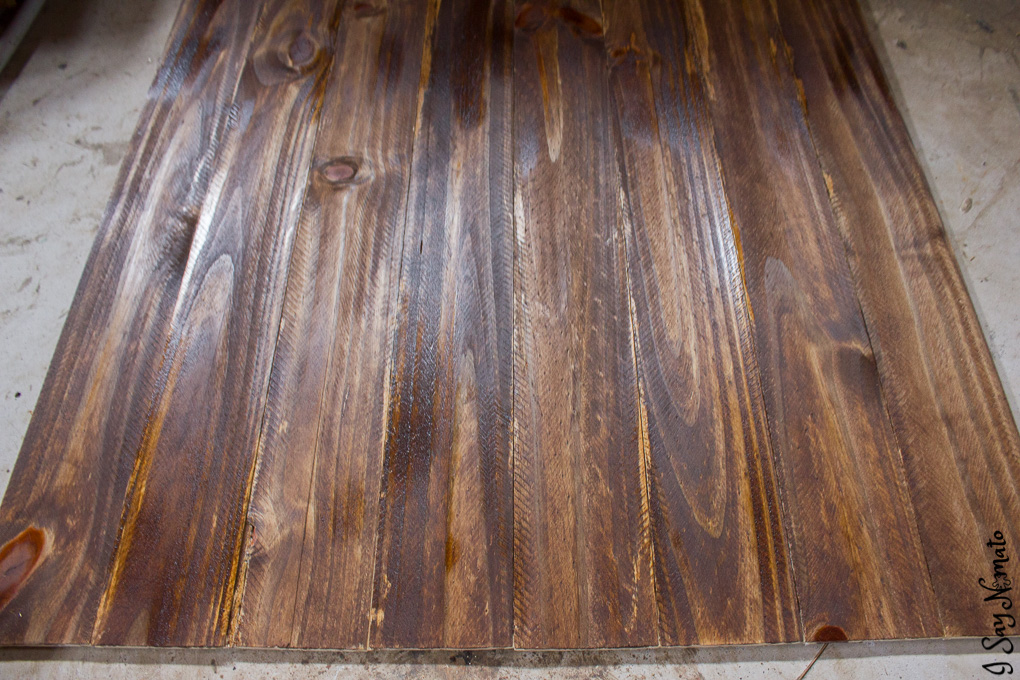
You can kind of see here on the bottom left where the residual glue is resisting the stain in the joints. I kind of like the more worn and uneven look it gives the wood, so I didn’t really try to keep it clean.
If you REALLY want to crank it up a notch, have at ‘er with some nails or chains until your neighbours think you’ve lost it to make the wood look very used and old.
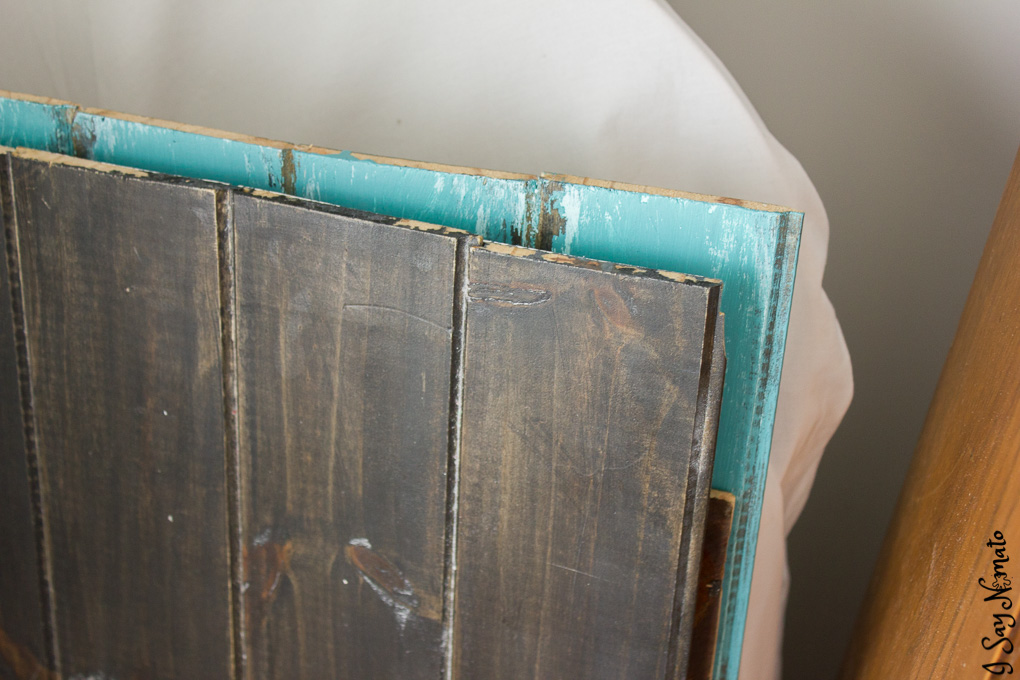
Step 4: Now do the other side!
This side I just rubbed just a little tiny bit of the stain at a time on with a rag to give it a ‘pub’ look. Needed some elbow grease to rub it in until I was happy with it. I love love LOVE the weathering with all the holes in the middle.
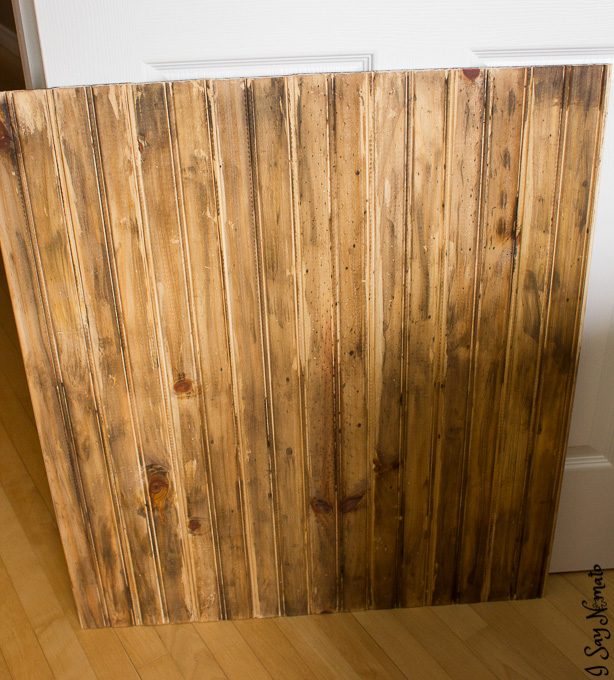
Minwax finish in Espresso, rubbed on and in VERY LIGHTLY with a rag
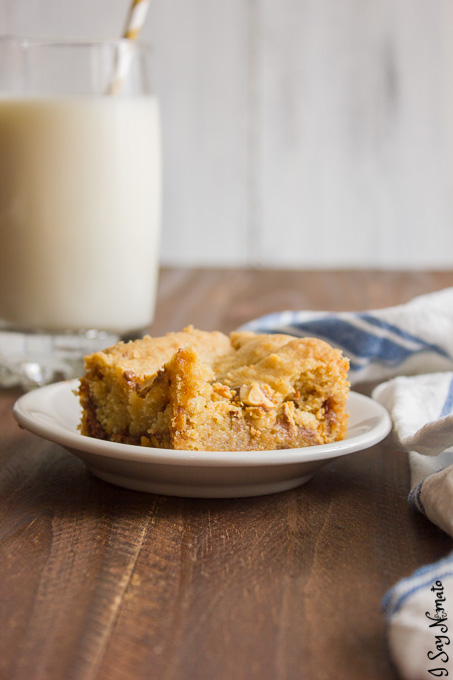
All done! Now I can use these fake tabletops in my photos, like this coming Thursday’s Chocolate Caramel Blondies!
Set-up:
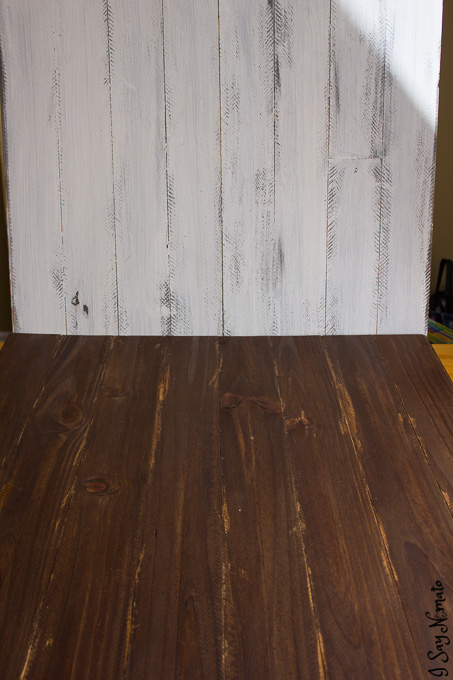
Finished product!
Here are some of the other boards I’ve done:
Minwax Ebony (3 coats – this one is super glossy and I have tried EVERYTHING to make it less glossy including matte spray, sandpaper & steel wool, any suggestions to make it more matte without making it lighter would be very much welcome!)
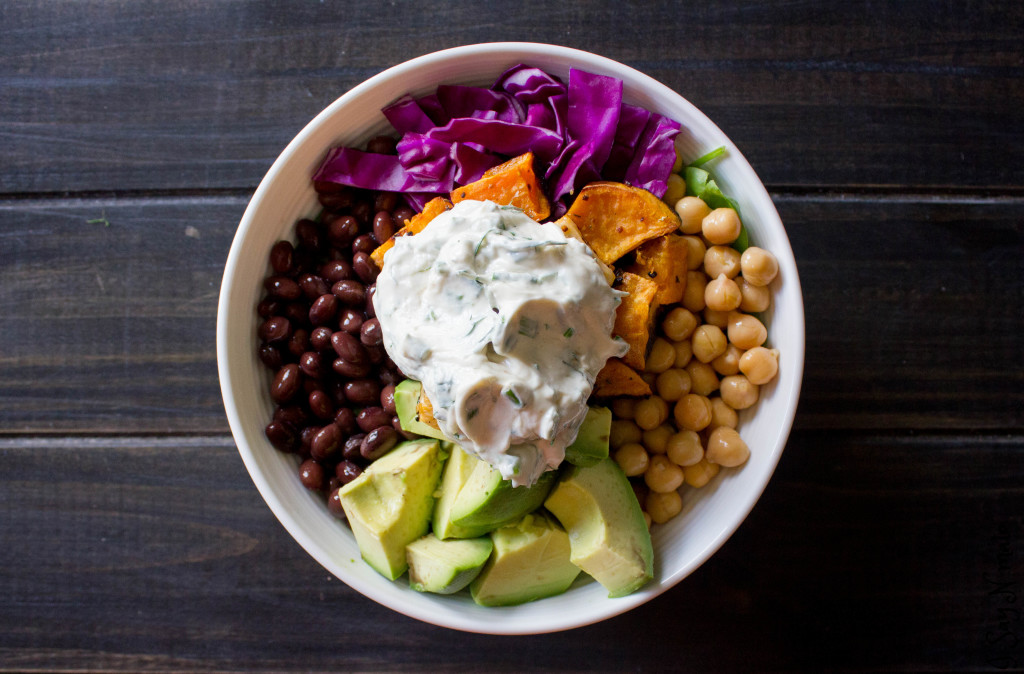 Recipe: Fall Harvest Salad Bowl
Minwax: Classic Grey (2 coats – I probably use this one the least, but it’s still so beautiful!)
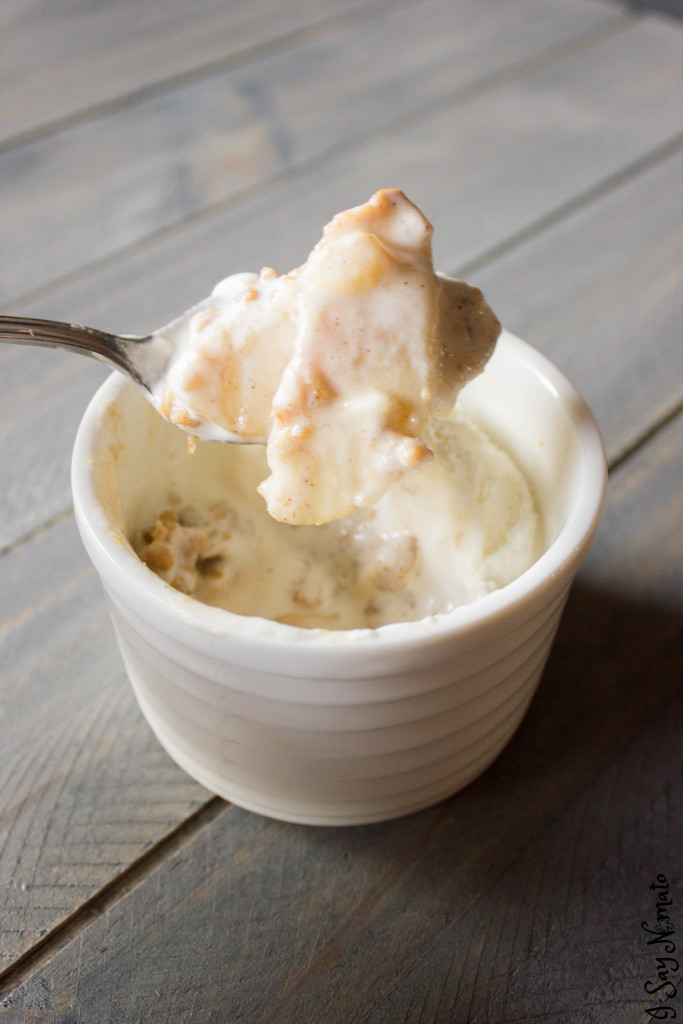 Recipe: Apple Crisp
Minwax in Ebony (1 coat)
Behr Marquee in Bali Bliss (1 coat alone, 1 coat mixed with white, then another coat alone)
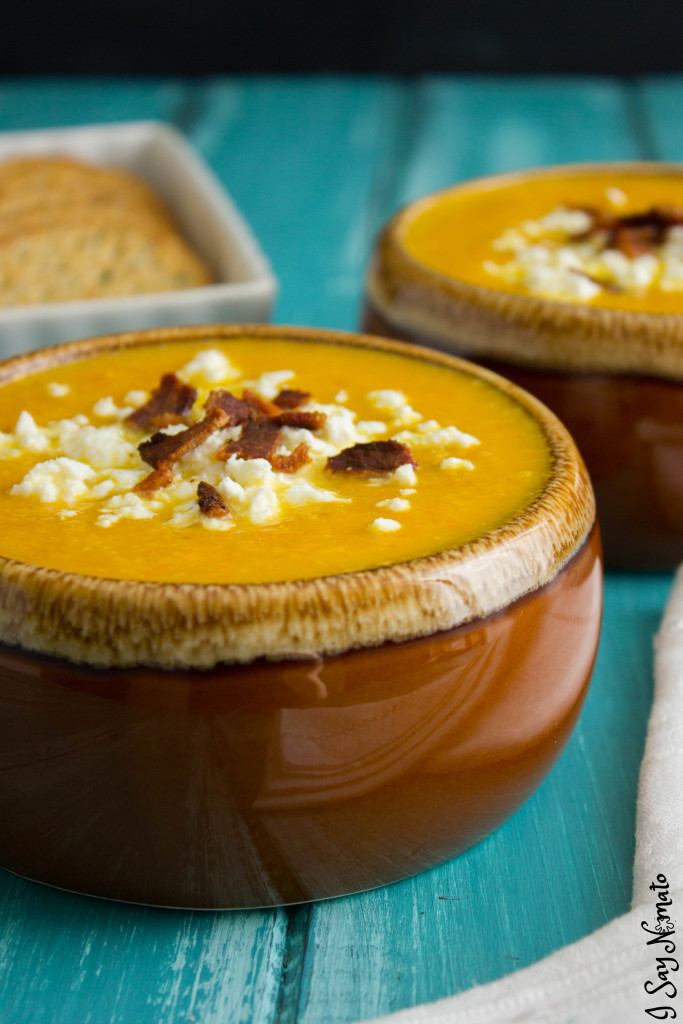 Recipe: Hearty Winter Butternut Squash Soup
Minwax Classic Grey (1 coat)
The whitest white I could find! It was Behr Marquee, but I’m not sure of the name since there’s no tag and I painted it last summer.
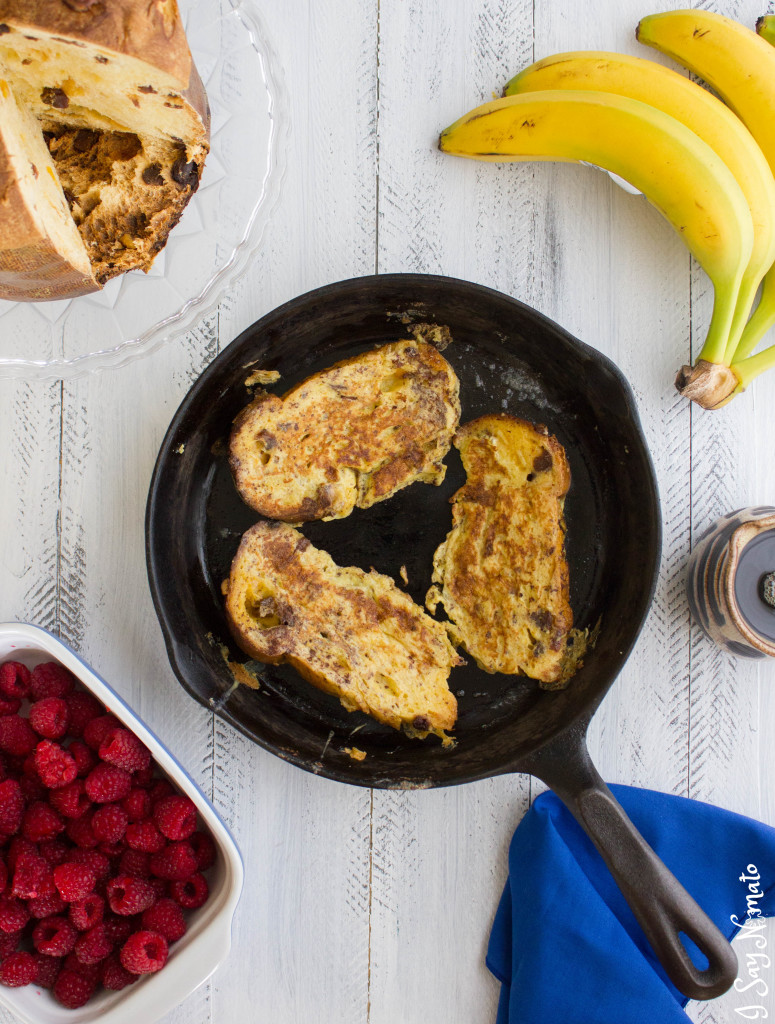 Recipe: Panettone French Toast
I hope you enjoyed this tutorial! Have so much fun making your own fake table tops, but be careful, it can get addicting!
UPDATE! I would LOVE to see what you come up with if you decide to make these. I think there are so many beautiful and interesting backgrounds that can be created this way! If you do make them, just tag I Say Nomato on Instagram, Facebook or Twitter, and I’ll share them so other people can get ideas. I can’t wait to see what you come up with!