


Welcome to Week #3 of my Nova Scotia local food series! What better way to celebrate a local festival than with its namesake in COOKIES? These Apple Blossom Sugar Cookies are so easy to make. They’re smooth, buttery, and not too sweet!

![]()
I live in the little corner of Nova Scotia called the Annapolis Valley, which (despite its name) is far from Apple-less (ha!). It’s known for its muddy waters, farms, but mostly apple orchards. It’s on the sign. AND there’s a giant metal apple. So apples are a Big Deal around here.
This past weekend was the Apple Blossom Festival. There are parades and fireworks, we even have a queen! It also usually marks the first official sunburn of the year for us sun-starved folks. I mean, when every tree around you is like this:
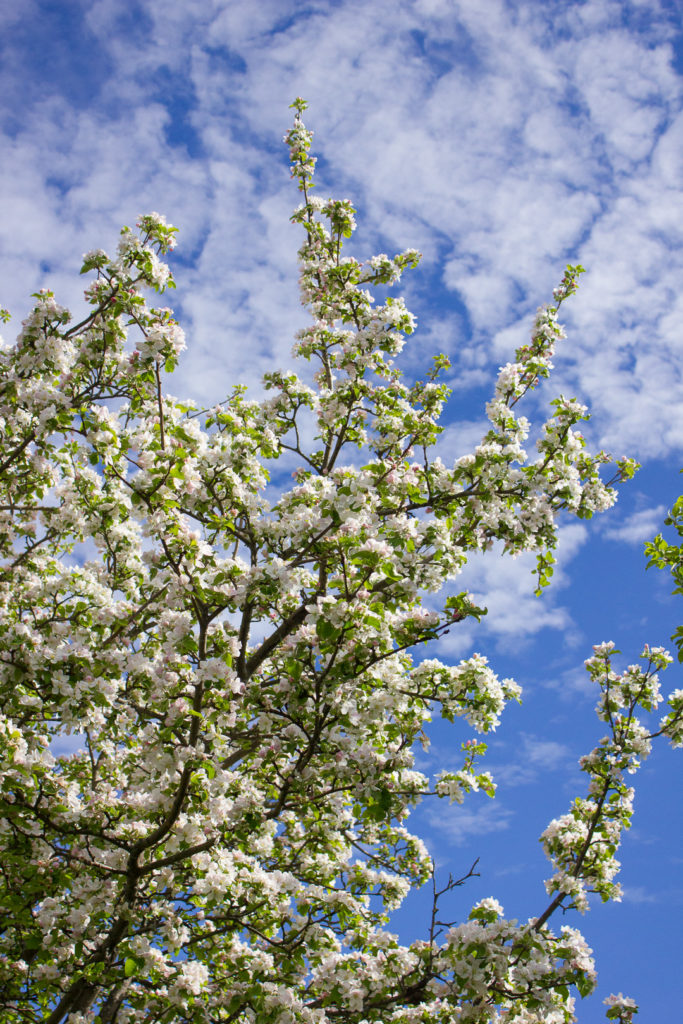
…that is worth celebrating!
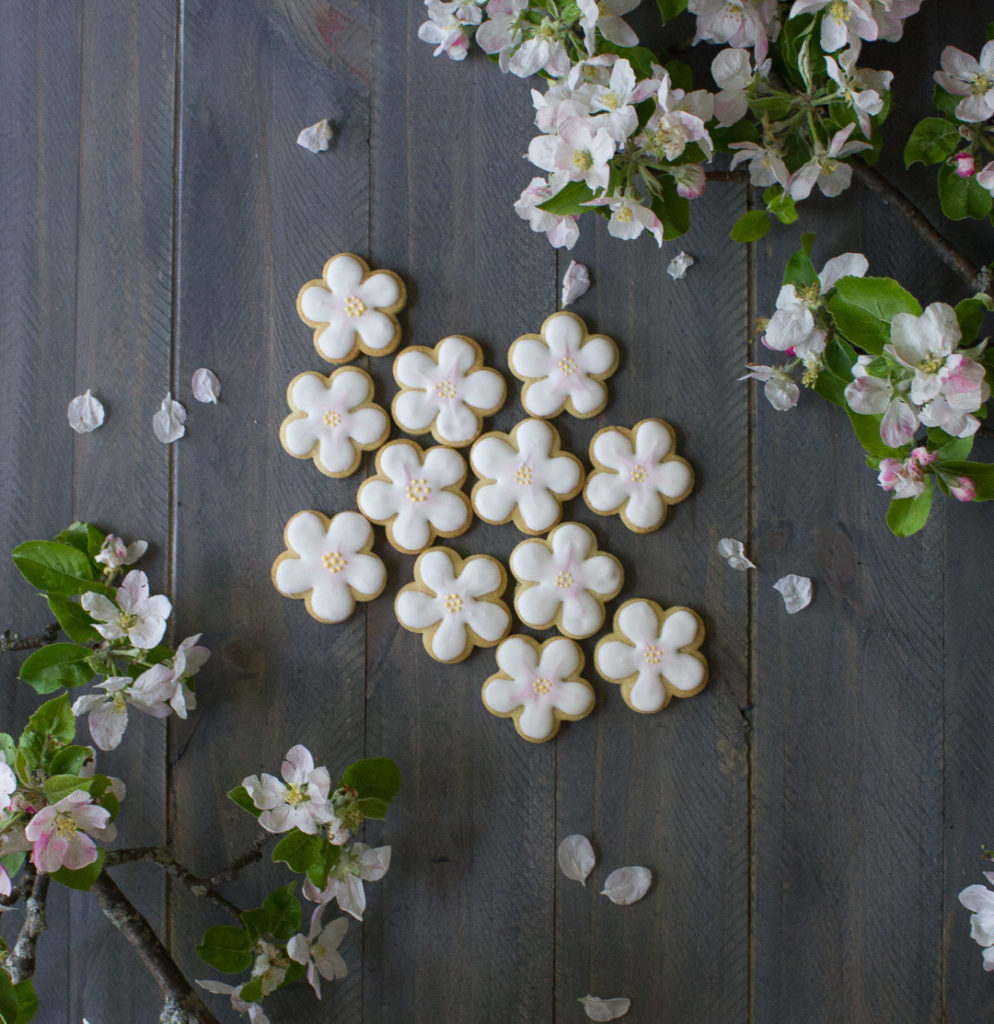
This year I thought I’d celebrate by making Apple Blossom Sugar Cookies! No, it was not just an excuse to feed my newfound cookie decorating addiction (yes it’s a problem, send help and a tall glass of milk!)… okay fine. It was. Luckily for you I was in tutorial mode so not only is this picture heavy, but I’ve even got a step-by-step video for you on how I decorated the cookies! (I’m apologizing for the hand right now, the cookies kept slipping! I’ll keep practicing.)
First, we need to actually make our cookies. I’m adapting an Almond-Vanilla Sugar Cookie recipe from the Queen of Cookies, Bake at 350, as well as her royal icing recipe (details on consistency etc. are below).
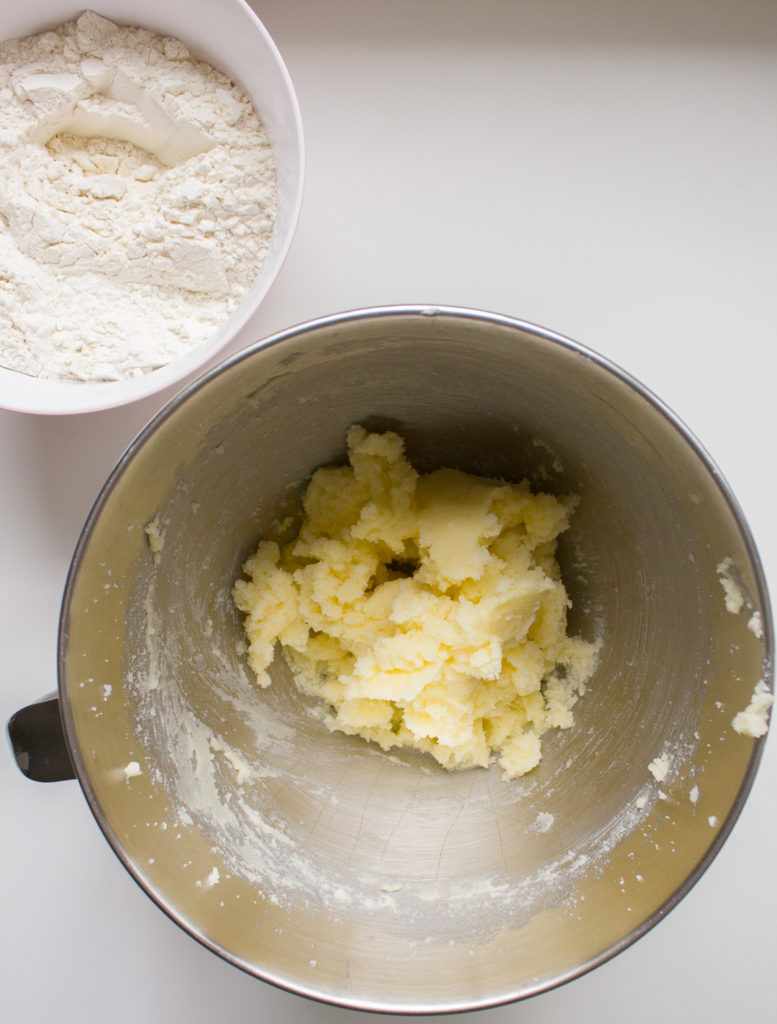
Mix your dry ingredients and cream your butter and sugar!
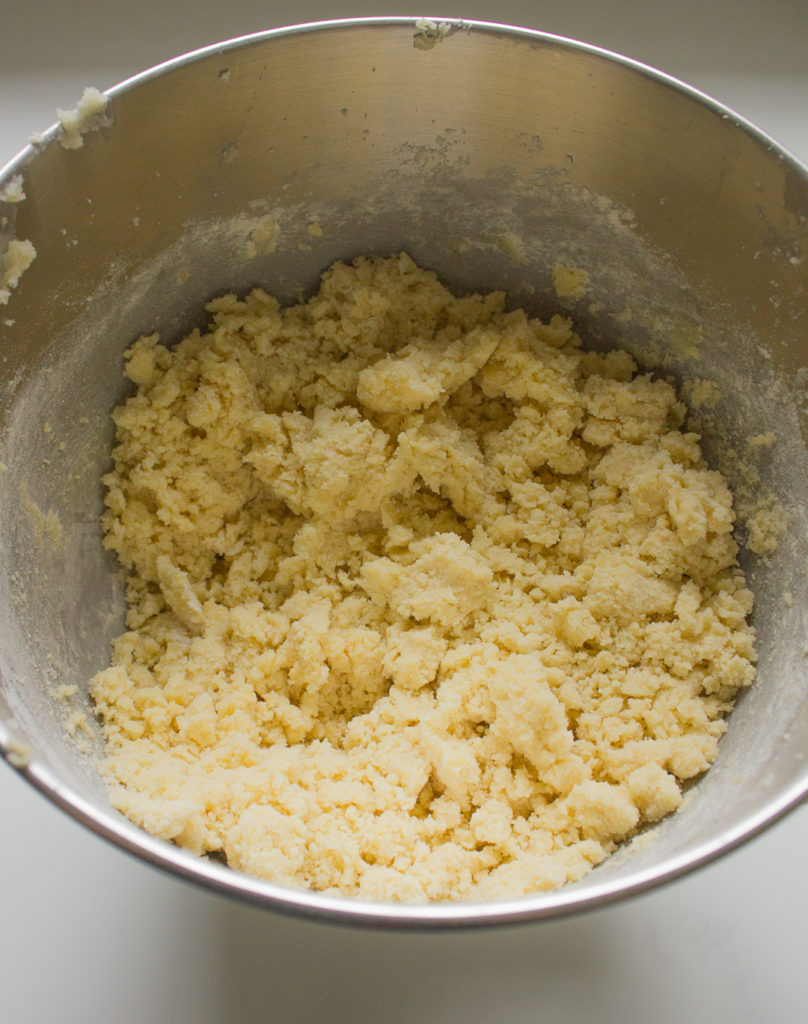
Add your eggs and extracts, then the dry to the wet and stir until juuuust combined. It should still be a little crumbly.
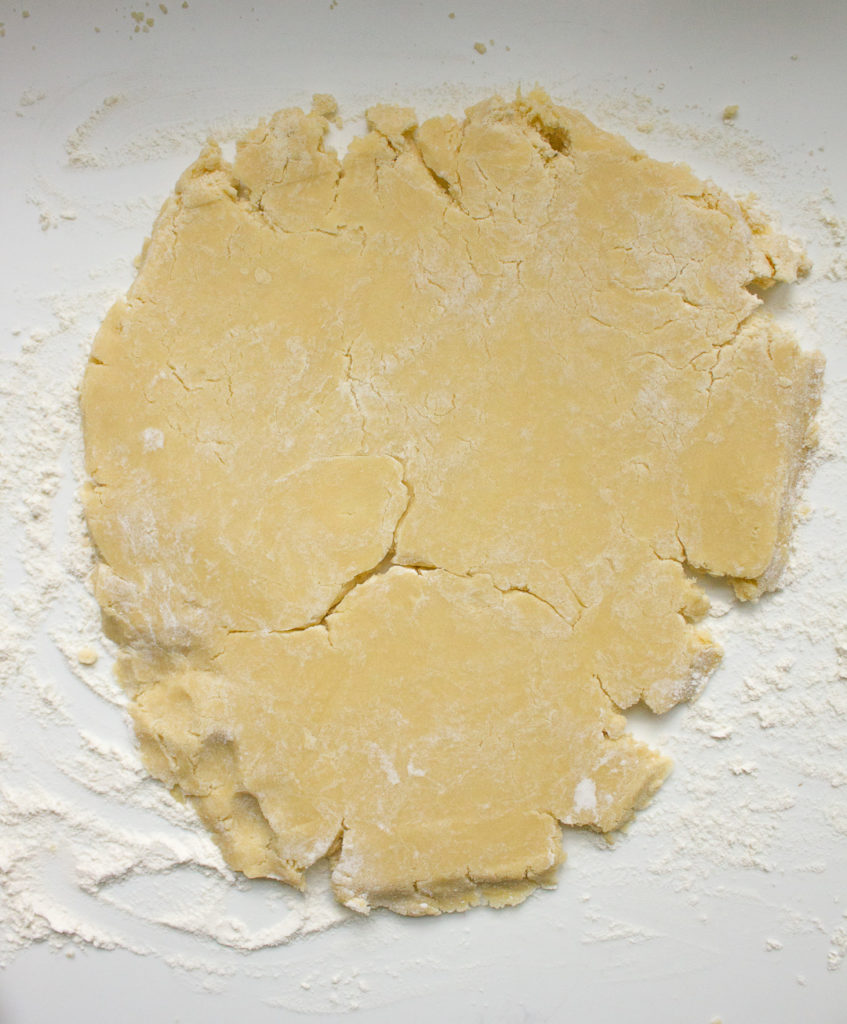
Scoop that out onto a lightly floured surface, and form all your little dough crumbs into a ball. Roll it out.
Try not to cry because the dough has a giant crack in the centre, realize that even though it’s spring, it’s still way too cold in your kitchen. Get some parchment paper and a hair dryer, and have at ‘er for like… 30 seconds.

Voila! It’s fixed! Thank you Google for always having the answers to my baking emergencies.
Cut out your cookies using a 5-petal flower cookie cutter. (For some reason my sister’s giant jug of 101 cookie cutters didn’t have this one, DARN YOU BETTY CROCKER! But I had one in my cake decorating kit for cutting fondant.)
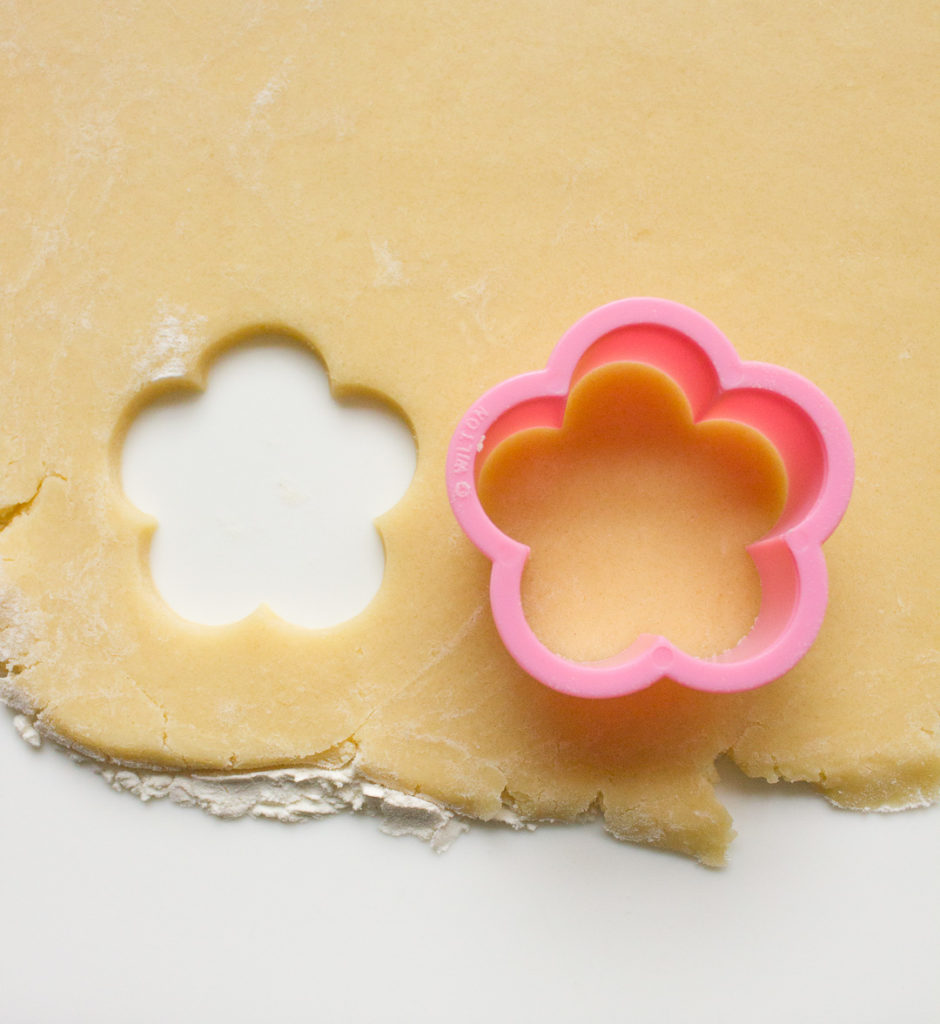
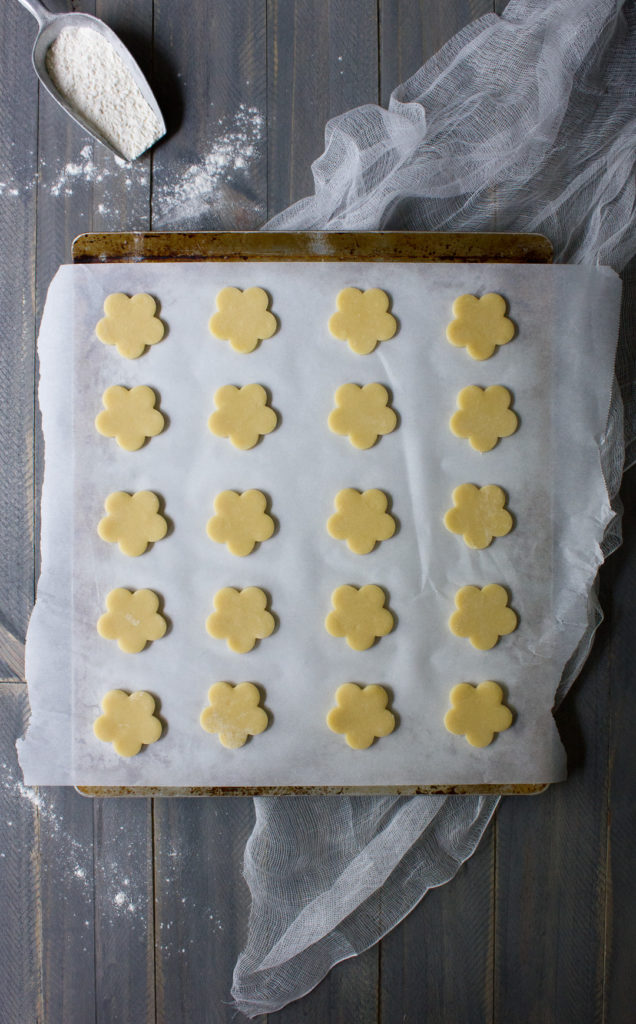
Cut ’em as close together as possible, and then place them on a parchment covered baking sheet. Keep cutting and re-rolling the dough until it’s all used up.
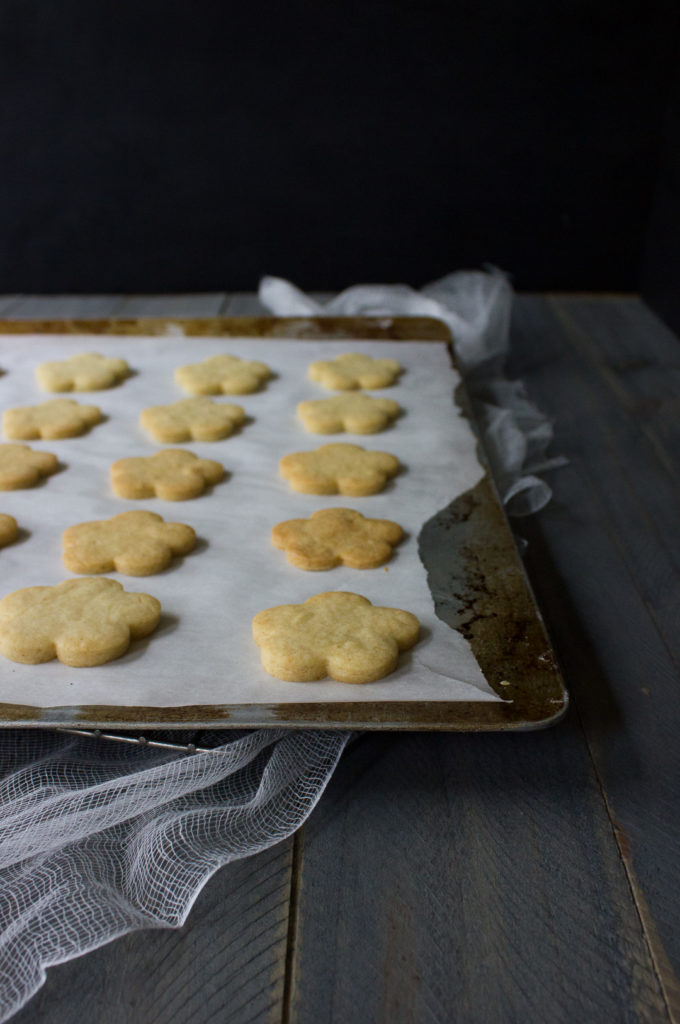
Bake those bad boys in the oven at 350° for 12-15 minutes (mine took 18, I have a slow oven).
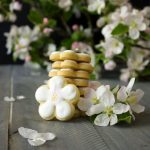
Mmmm cookies. I mean, if you have to eat that one of them that didn’t turn out perfectly, it’ll be fine. What’s one cookie when you have like, 40 of them.
Okay, when it comes to royal icing, I’ll put the recipe below, but I’m going to send you straight to the source, Bake at 350 if you want pictorial instructions! She does a great job of explaining it, better than I ever could!
You want 15 second royal icing, which means you add juuust enough water to your royal icing paste that if you run your spoon through it, it will take 15 seconds to go back to normal. It’s kind of multi-purpose and is perfect for both outlining and filling your sugar cookies! You’ll want to keep most of it white, but set aside about a cup to dye a light pink.
If you want to know how to decorate the cookies, watch the video below!
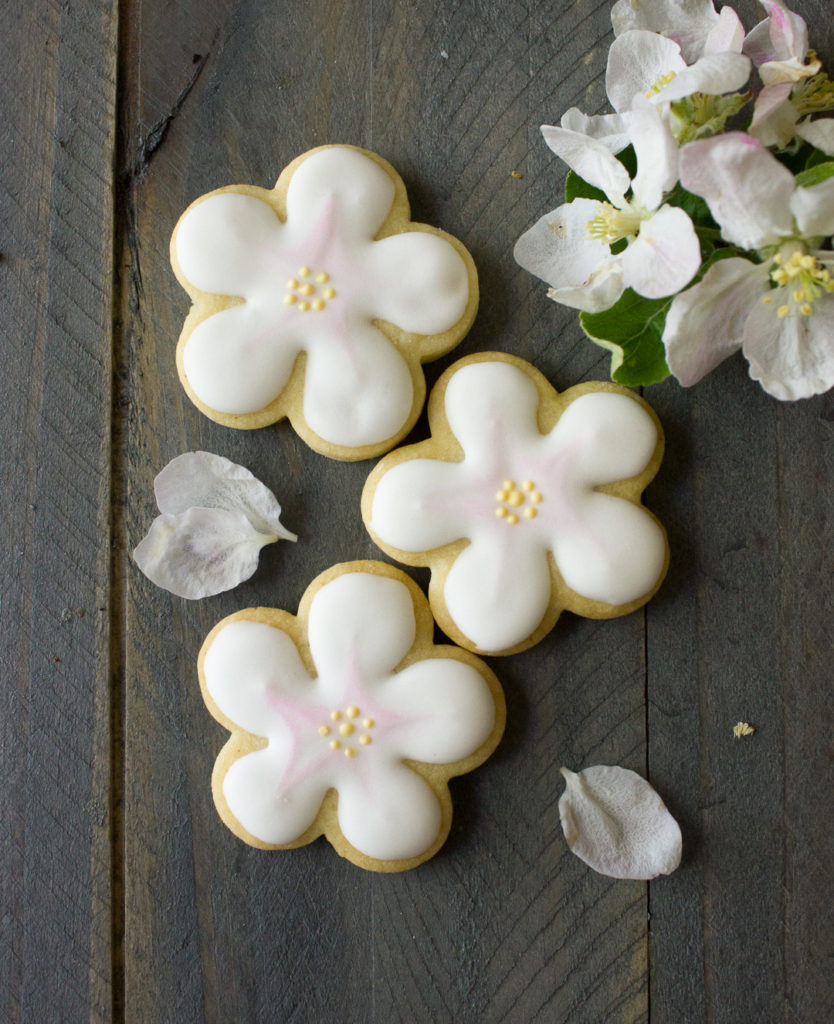
And there you are, lovely Apple Blossom Sugar Cookies!
I love local festivals, they can be so weird sometimes! This one’s pretty tame compared to some of the other ones around here. Does your town do anything to celebrate spring?
- 3 cups flour
- 2 tsp baking powder
- 1 cup white granulated sugar
- 1 cup butter , room temperature (if you live in a very warm place, from the fridge is fine)
- 1 egg
- 1 tsp vanilla extract
- OPTIONAL: 1 tsp almond extract
- 4 Tbsp meringue powder
- 1/2 cup of water , minus 1 tablespoon.
- 1 lb . powdered sugar , sifted
- 1 tsp light corn syrup
- 1/2 tsp clear vanilla extract
- OPTIONAL: 1/2 tsp clear almond extract
- Pink and yellow food colouring (gel or powder is best because it doesn't add any more liquid)
- 1 cup of water and a tablespoon or clean spray bottle
-
Heat the oven to 350°.
-
In a bowl, combine the flour and baking powder, and set aside.
-
In a mixing bowl, cream the sugar and butter until smooth.
-
Add the egg and vanilla and almond extracts.
-
On low speed, slowly add the flour mixture to the butter mixture, and mix until just combined. It will still be crumbly.
-
Pour the dough onto a floured surface, squeezing it into a ball.
-
Roll out, and cut with a five-petal flower cutter, making sure to keep your flowers as close together as possible. Place cut-out flowers on a parchment covered baking sheet. Reroll your extra dough and repeat until all the dough is used.
-
Bake for 12-15 minutes.
-
Remove from the oven and let cool for a few minutes on the pans before transferring them to a cooling rack. They need to be completely cool before you ice them.
-
Using a paddle attachment on your mixer, mix the water and meringue powder and beat until it's foamy, scraping the sides with a spatula if necessary.
-
Add your sifted powdered sugar and continue to mix on low.
-
Add the corn syrup and extract(s), scraping the sides to make sure everything is incorporated.
-
Turn your mixer to medium-high, and continue to beat just until the royal icing is glossy and has stiff peaks. Don't overbeat it! This will ruin your icing. It takes about 2-5 minutes.
-
If you want to store or freeze the icing, do it at this stage, while it is very stiff.
-
Measure out 1/2 cup of icing each for the pink dye and the yellow dye, and place them in separate bowls. Dye them and really stir to make sure that the colour is evenly distributed.
-
Royal icing dries very quickly, so while you're working on one bowl, put plastic wrap on the other bowls directly in contact with the icing all over so that it doesn't harden on top.
-
We want 15-second royal icing, so we are going to add water a tablespoon at a time (or with a squirt from the spray bottle), stirring after every addition.
-
You will know it's the right consistency when you run your spoon through it and it takes about 15 seconds for the line to disappear. Do this for your white, pink, and yellow icing.
-
Using a piping bag filled with white 15 second icing and fitted with a #1 (small, round tip), make the outline of the petals one at a time, making sure that they are completely separated until they join in the middle. I find it easier to alternate sides to keep the petals even!
-
Once the outlines are complete, fill in each petal in a circular motion with the icing using the same bag and tip.
-
Using a toothpick or sharp, metal tool, even out the icing, filling in any holes that you might have from filling them. Tap the cookie on the table to get rid of air bubbles, and lance any that pop to the surface.
-
While the white icing is still wet, use a piping bag filled with pale pink icing and a #2 (slightly larger, round) tip to pipe a large dot in the centre of the cookie.
-
Using a toothpick or tool, pull the pink icing from the centre down the middle of each petal, so that it forms a five-pointed star shape.
-
Let the iced cookie dry for 8-10 hours.
-
Using a piping bag filled with the yellow icing fitted with a #1 tip, place dots in the centre of the cookie. I like to have one in the middle and then a circle around it.
-
Let dry before you stack or transport!
It will probably take you 30 mins to an hour to decorate all of the cookies.
This recipe makes A LOT of flower cookies. If it's too much for you, I recommend making the whole recipe and then freezing some for later instead of trying to halve the dough recipe.
If you need to store your icing (like your yellow because you aren't using it right away), put it in a ziplock bag and squeeze all the air out. Royal icing gets hard very quickly (like we want it to!) so always make sure what you're not using is covered with plastic wrap touching the entire surface so there's no air contact.
Save