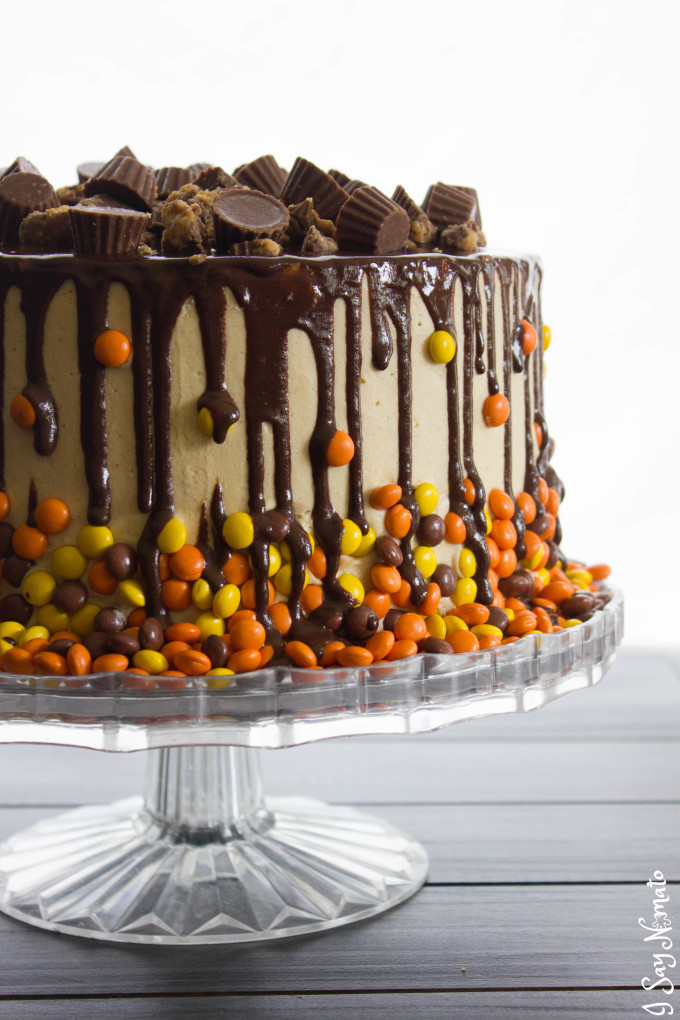
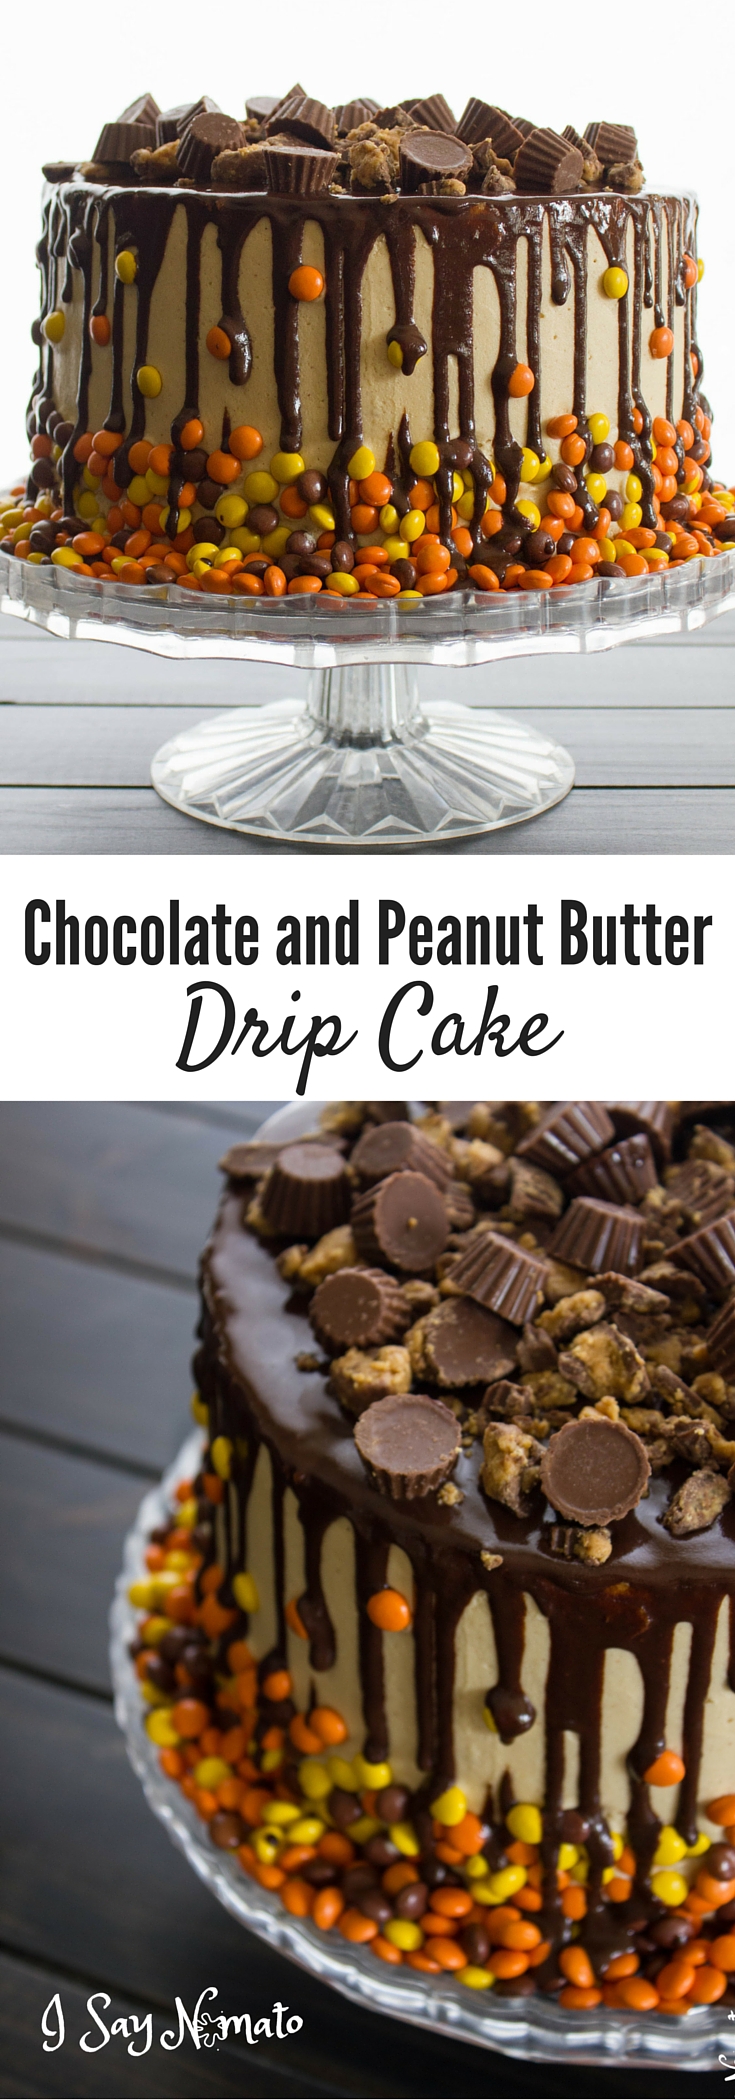
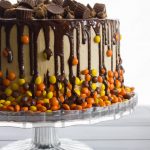
This Chocolate and Peanut Butter Drip Cake is completely sinful. With smooth peanut butter buttercream and a moist, rich chocolate cake topped with MORE chocolate AND peanut butter cups, it’s hard to say no to a slice of this!


One of life’s simplest pleasures is a good ol’ chocolate cake. Towering rounds of decadent chocolate fudge layered with smooth sweet cocoa buttercream… I can’t think if anything else I’d rather have as a birthday cake.
Oh wait.
Yes I can.
Add peanut butter to it! And chocolate ganache! And then take it five miles over the top with chocolate and peanut butter candy because that’s how I roll. Culminating in the blissful result that is this Chocolate and Peanut Butter Drip Cake.
Clearly I’ve been drooling over too many Katherine Sabbath drip cakes and they’ve taken over my brain. That lady is FOR REAL. I’ve lost hours of my life to watching How to Cake It videos on Youtube (but not wasted! Yolanda Gampp is brilliant!). It was time to put everything I’ve learned into practice with my sister’s birthday cake!
Betty Crocker’s Cocoa Fudge Cake can’t be beat (even though my mother’s handwriting is all over our recipe – that’s what cookbooks are for! Like me she tends to fiddle with recipes until they’re just how she likes them!), dark and rich and perfectly moist, it’s a chocolate cake classic.
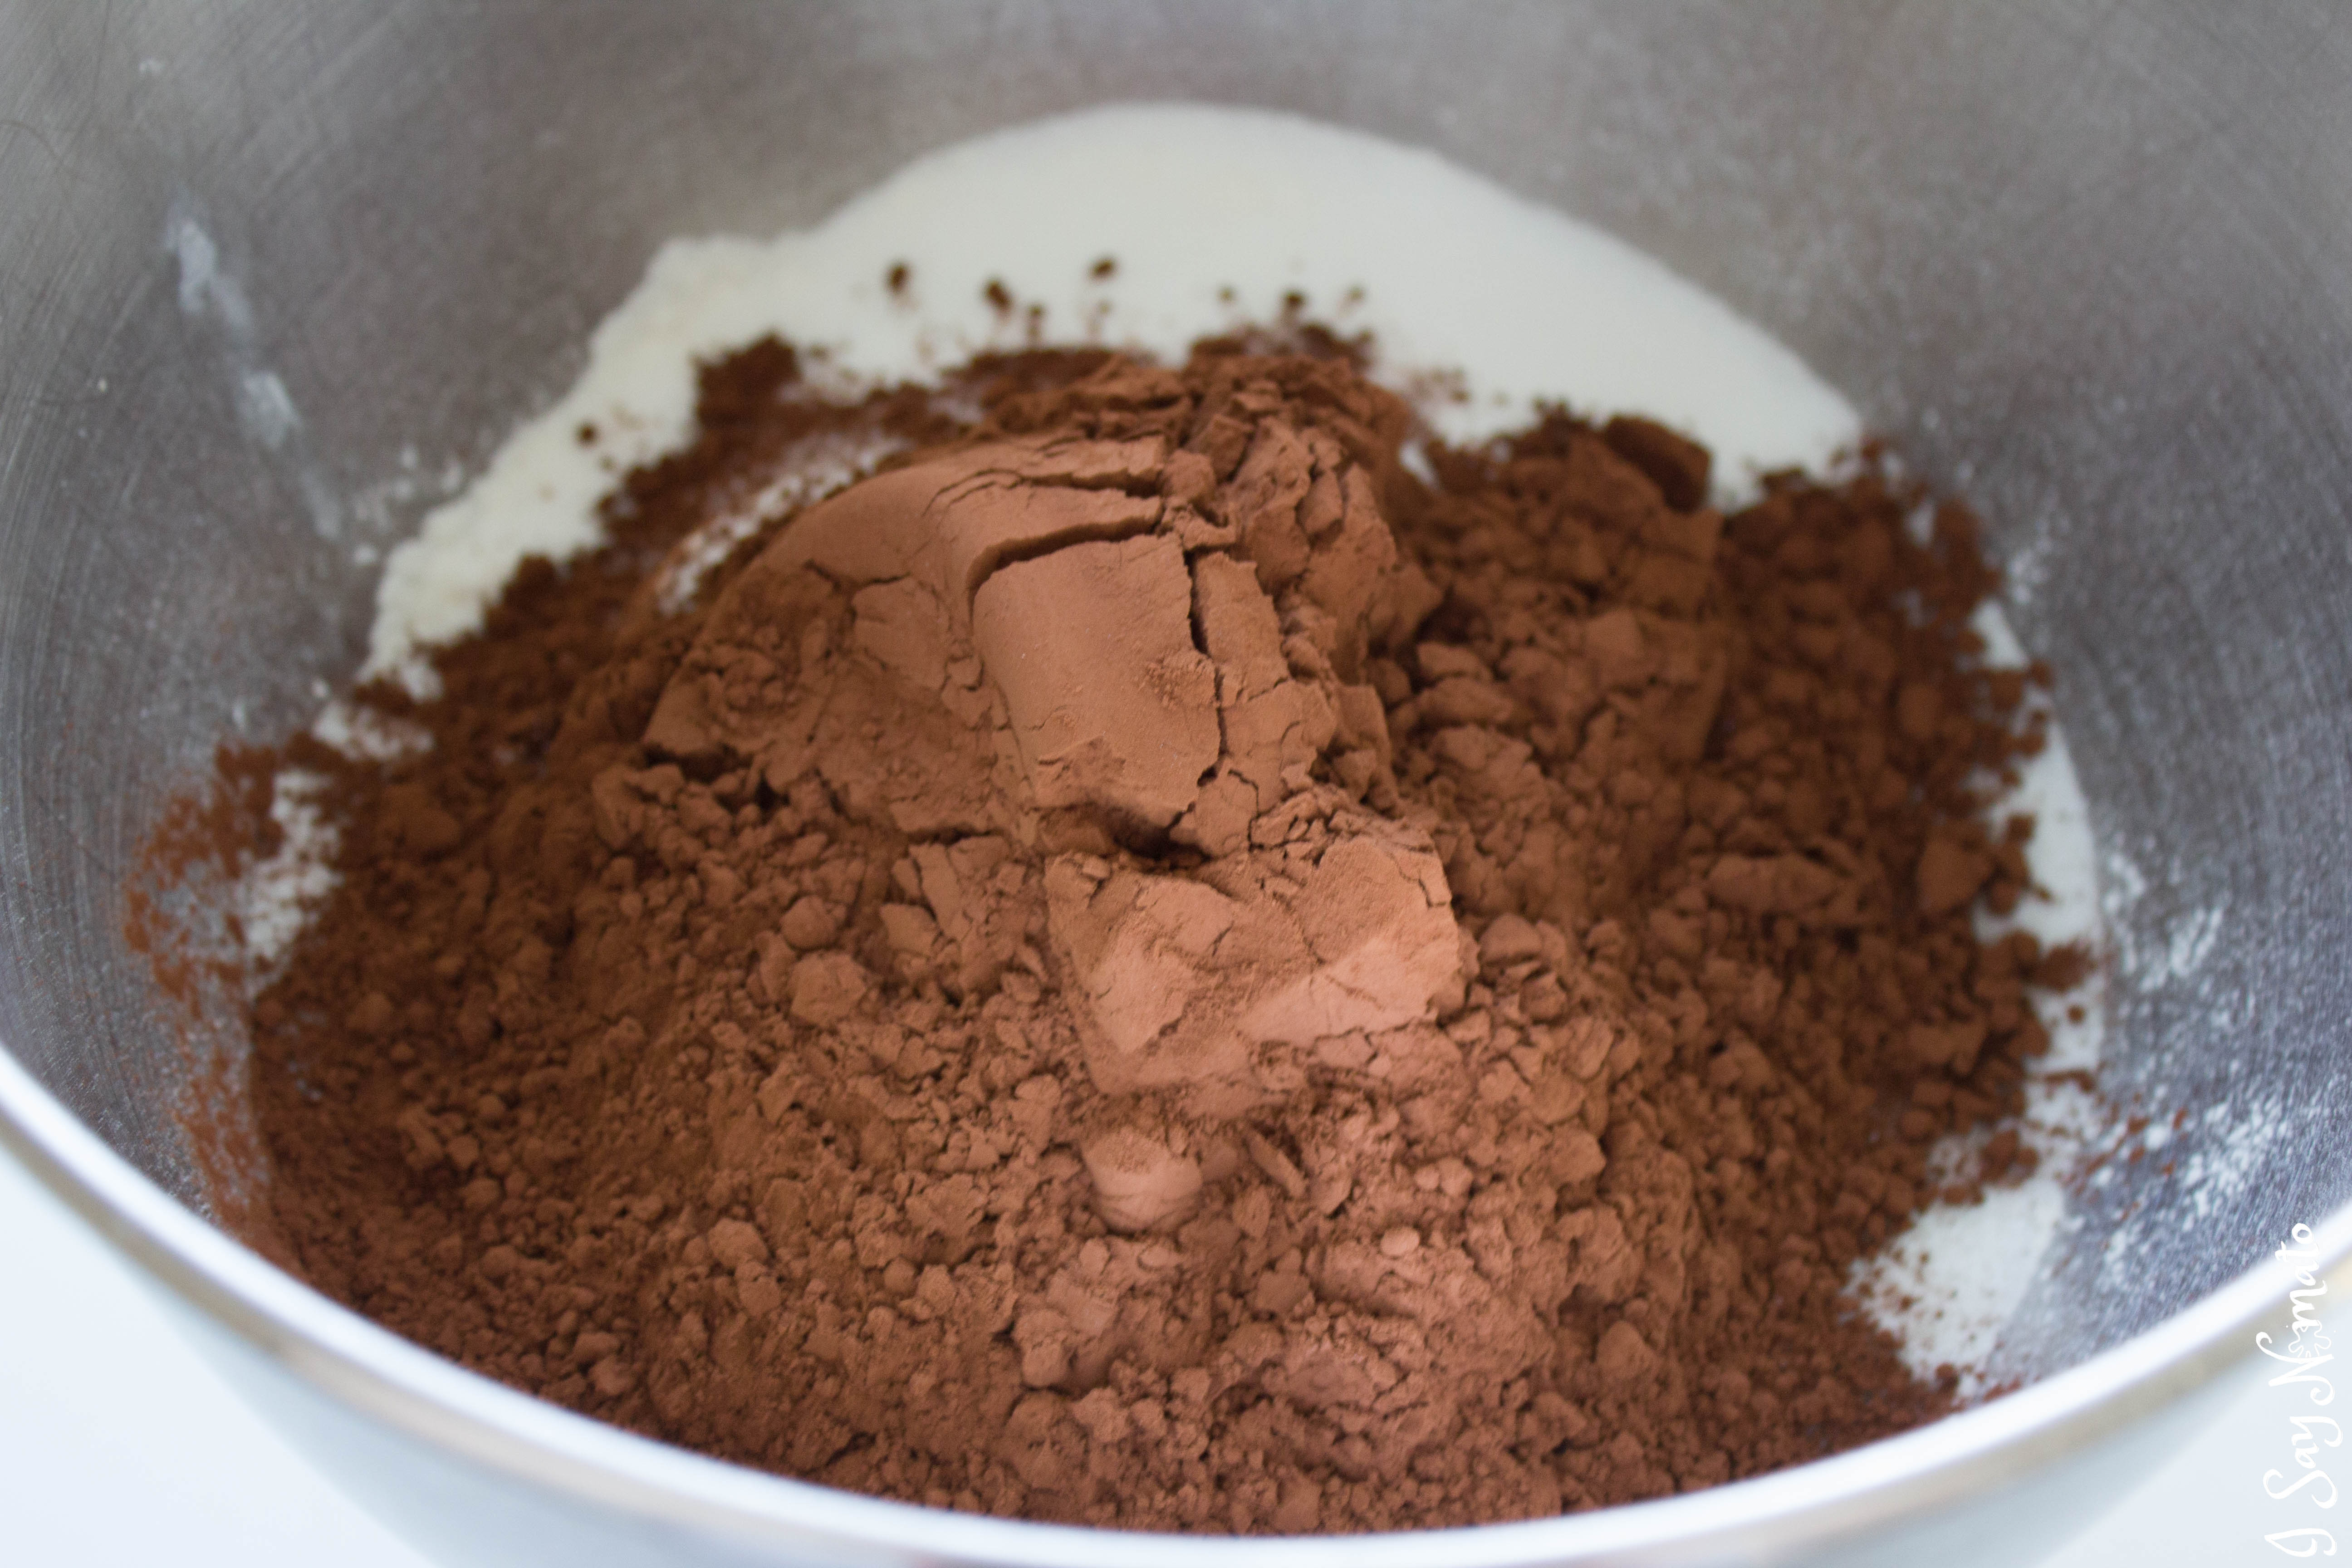
If you don’t have buttercream, start with cup on the side to mix milk and vinegar, and let sit for a couple minutes until it gets nice and chunky (EW – or just go buy buttermilk). Mix all of your dry ingredients in a bowl. Cocoa is so darn pretty – that colour is just soooo rich.
Then add the milk and the rest of your wet ingredients. Beat them all together, scraping down the sides of your bowl every once in a while so everything gets mixed together. Then turn that sucker up and beat the mixture on high for about 3 minutes.
Set those to bake in the oven. You’ll want your cake to be completely cold (like sitting in the pan for 45 mins to an hour) before you attempt to level and frost it, to keep the structural integrity!
Now for the frosting! This buttercream recipe from Sweet Savory Life is hands down, THE most delicious frosting of all time. It tends to have air bubbles, but that flavour cannot be beat! It’s rich but not too sweet, very adaptable, and easy to make harder or softer as necessary.
I wanted the inside of the cake to be like a peanut butter cup, so I made some extra cocoa frosting to alternate layers. Mix all those ingredients in a bowl, you really can’t go wrong here. It needs to be easily spreadable, so if you need to add a little more cream, go ahead.
One layer at a time, carefully assemble your cake. Again, make sure that cake is COLD, for stability.
Crumb coat! This I didn’t know was a thing until I started taking decorating classes, but just put a thin layer of icing over the cake, enough to trap all the crumbs, and pop in the fridge or freezer for at least 30 minutes to really solidify that barrier before you frost the rest of the cake.

Frosting time! Slap lots on there. You’ll see that my cake was a little crooked in its layers, and that was easily fixable with a gentle shove and some icing.

In order to get a smooth buttercream, run a metal cake spatula under hot water and smooth it out with a little melting action. Yay science!
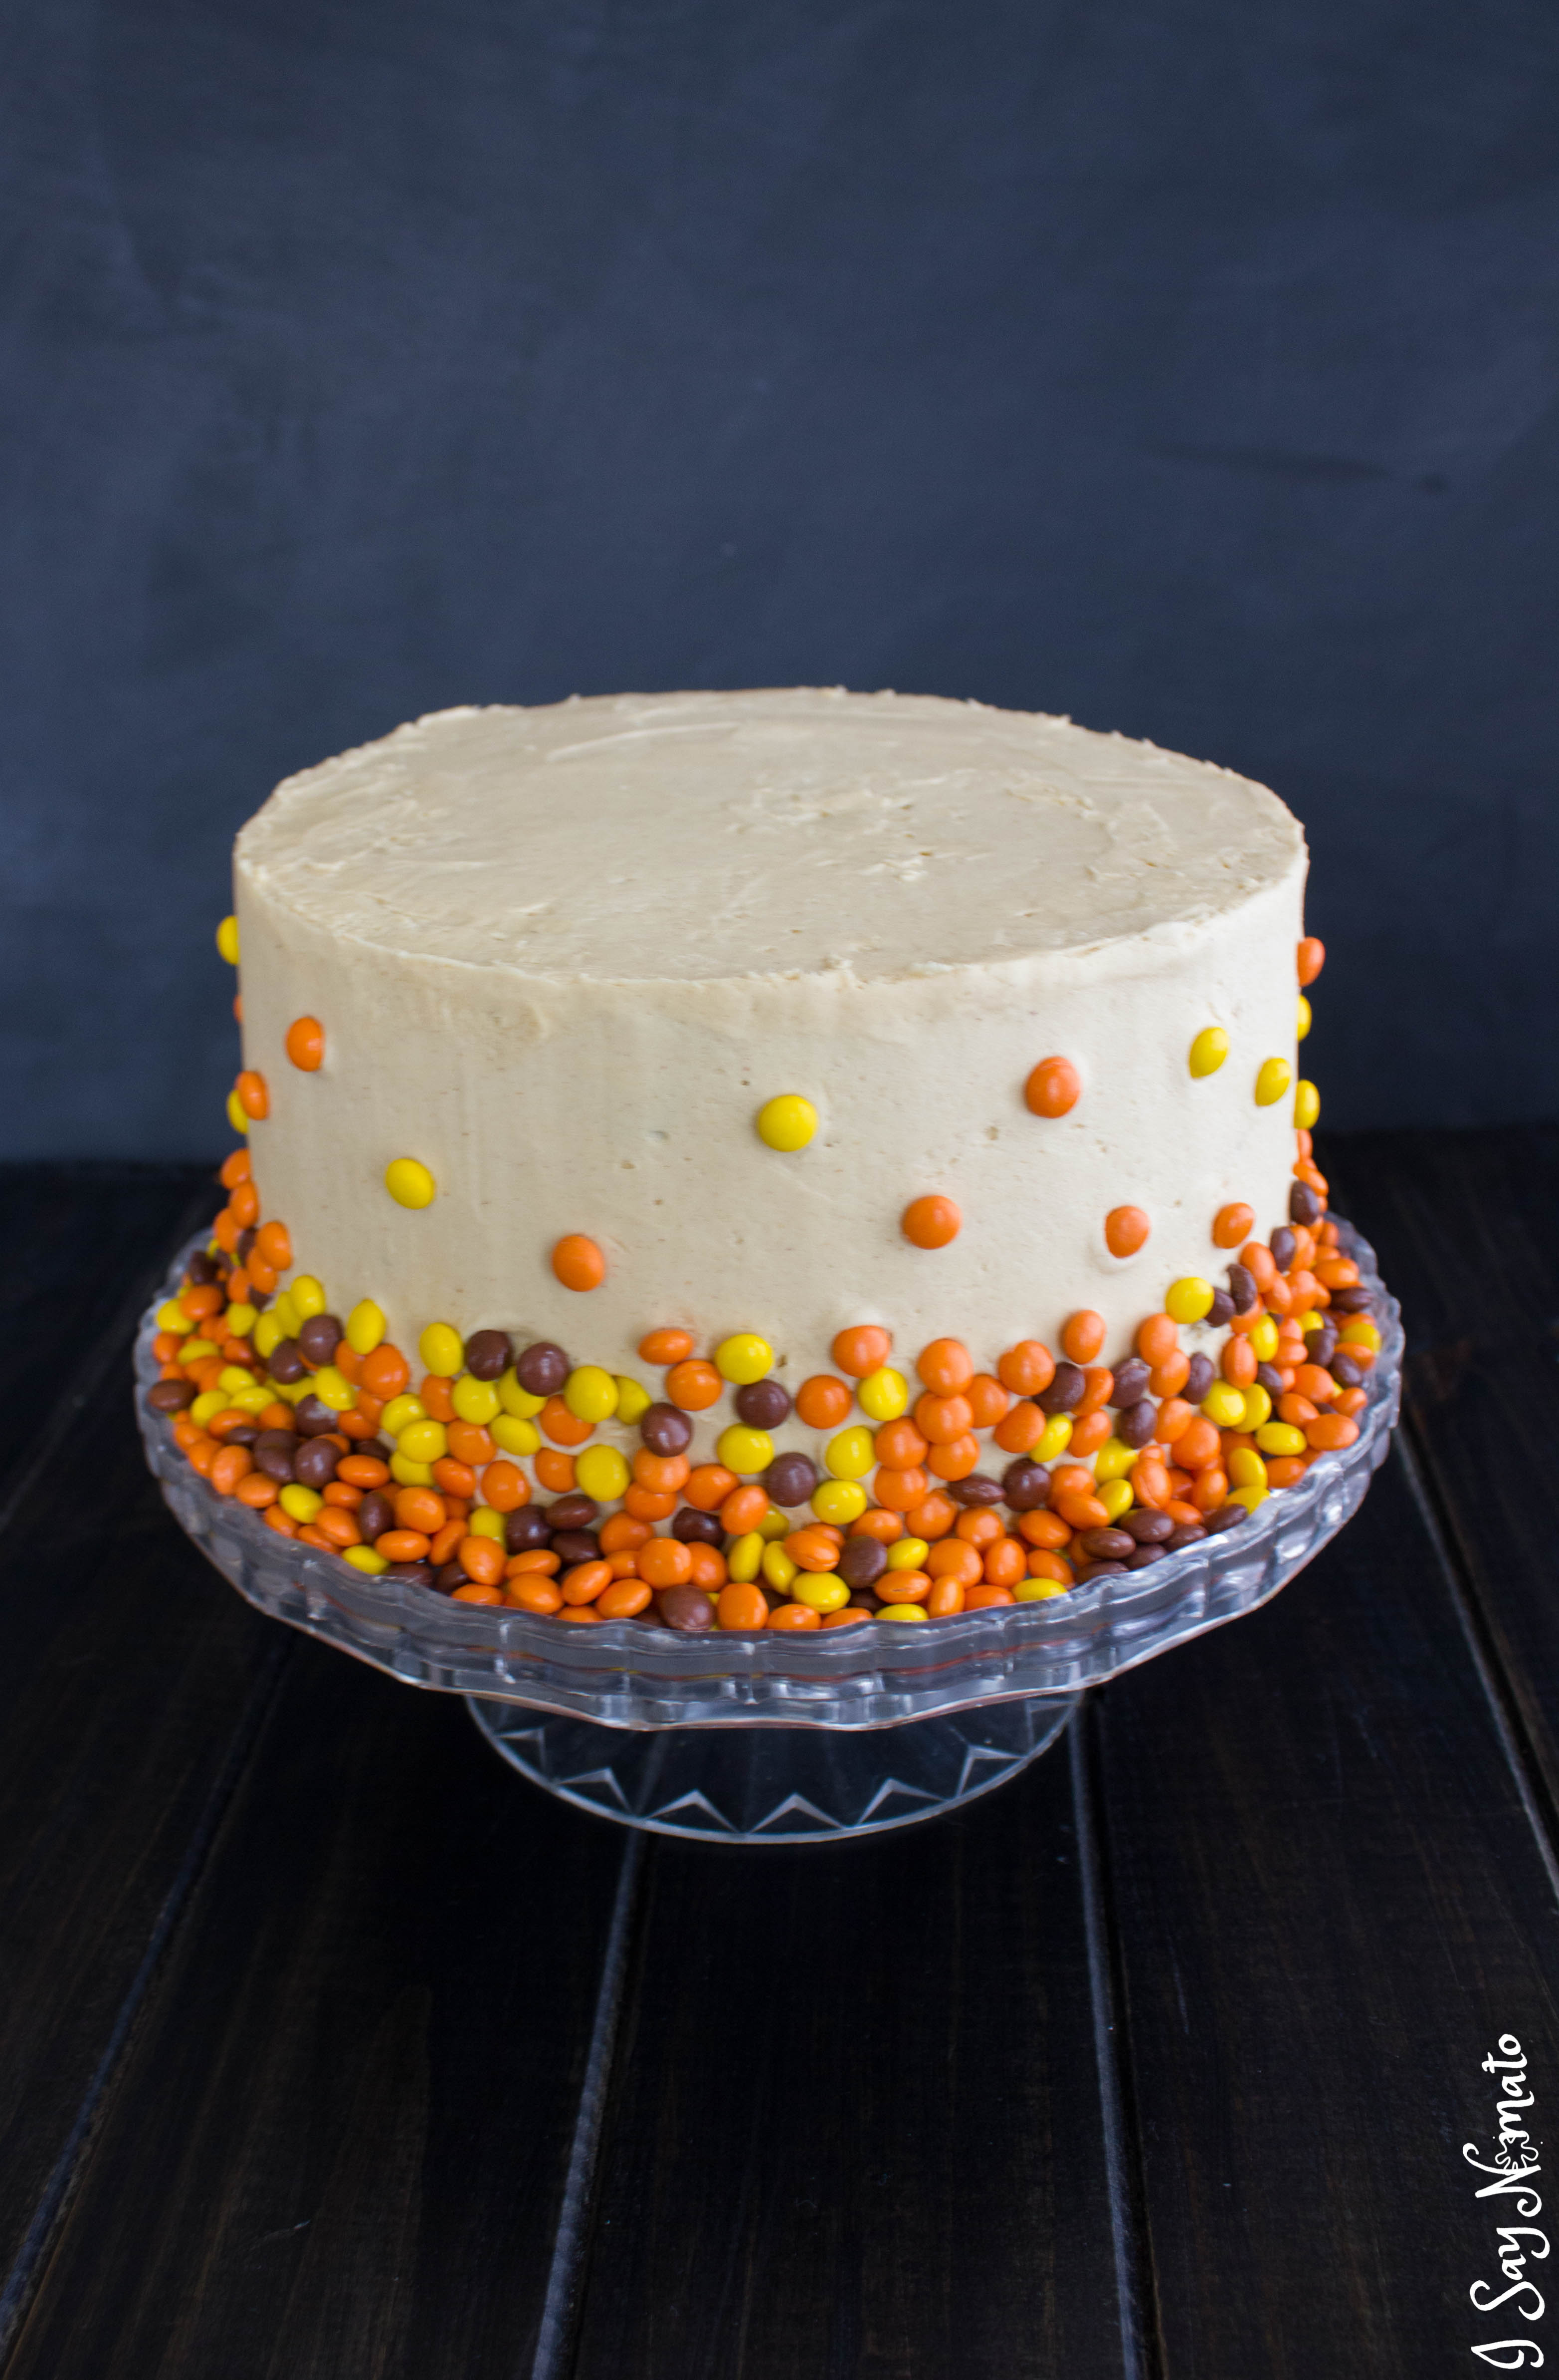
Press some mini Reese’s Pieces into the buttercream with your hands at the bottom, and speckle some around the rest of the cake…
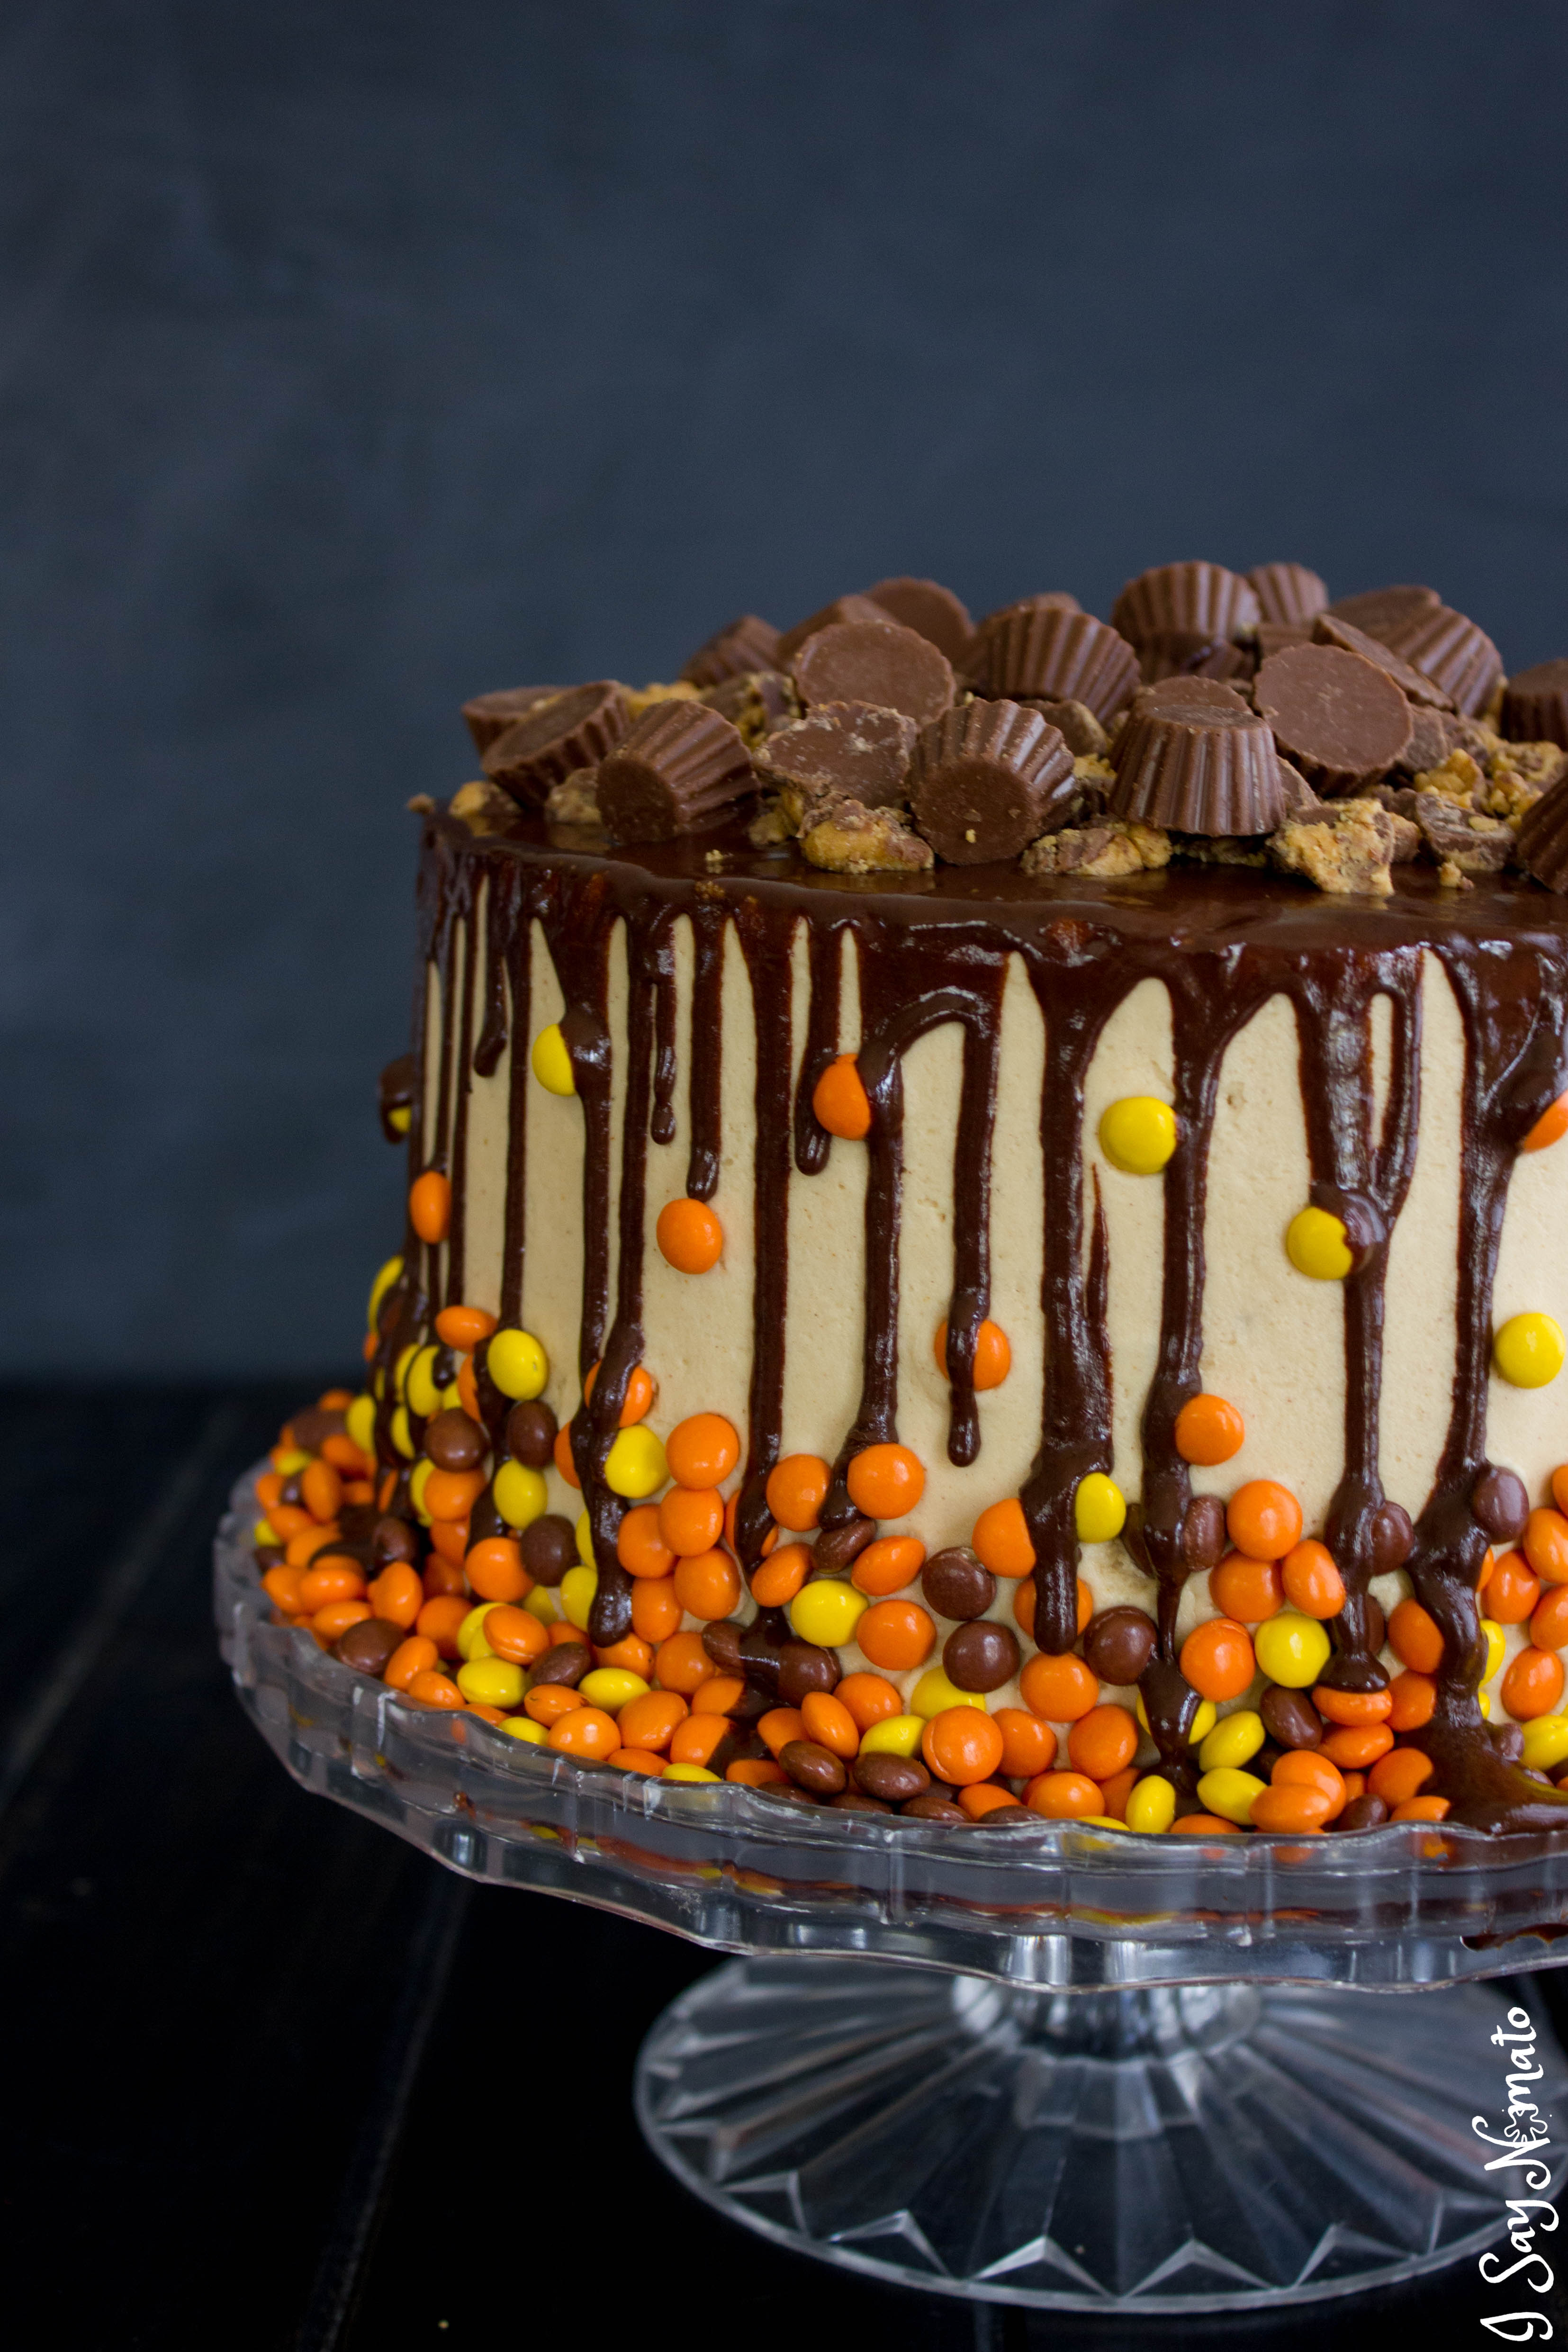
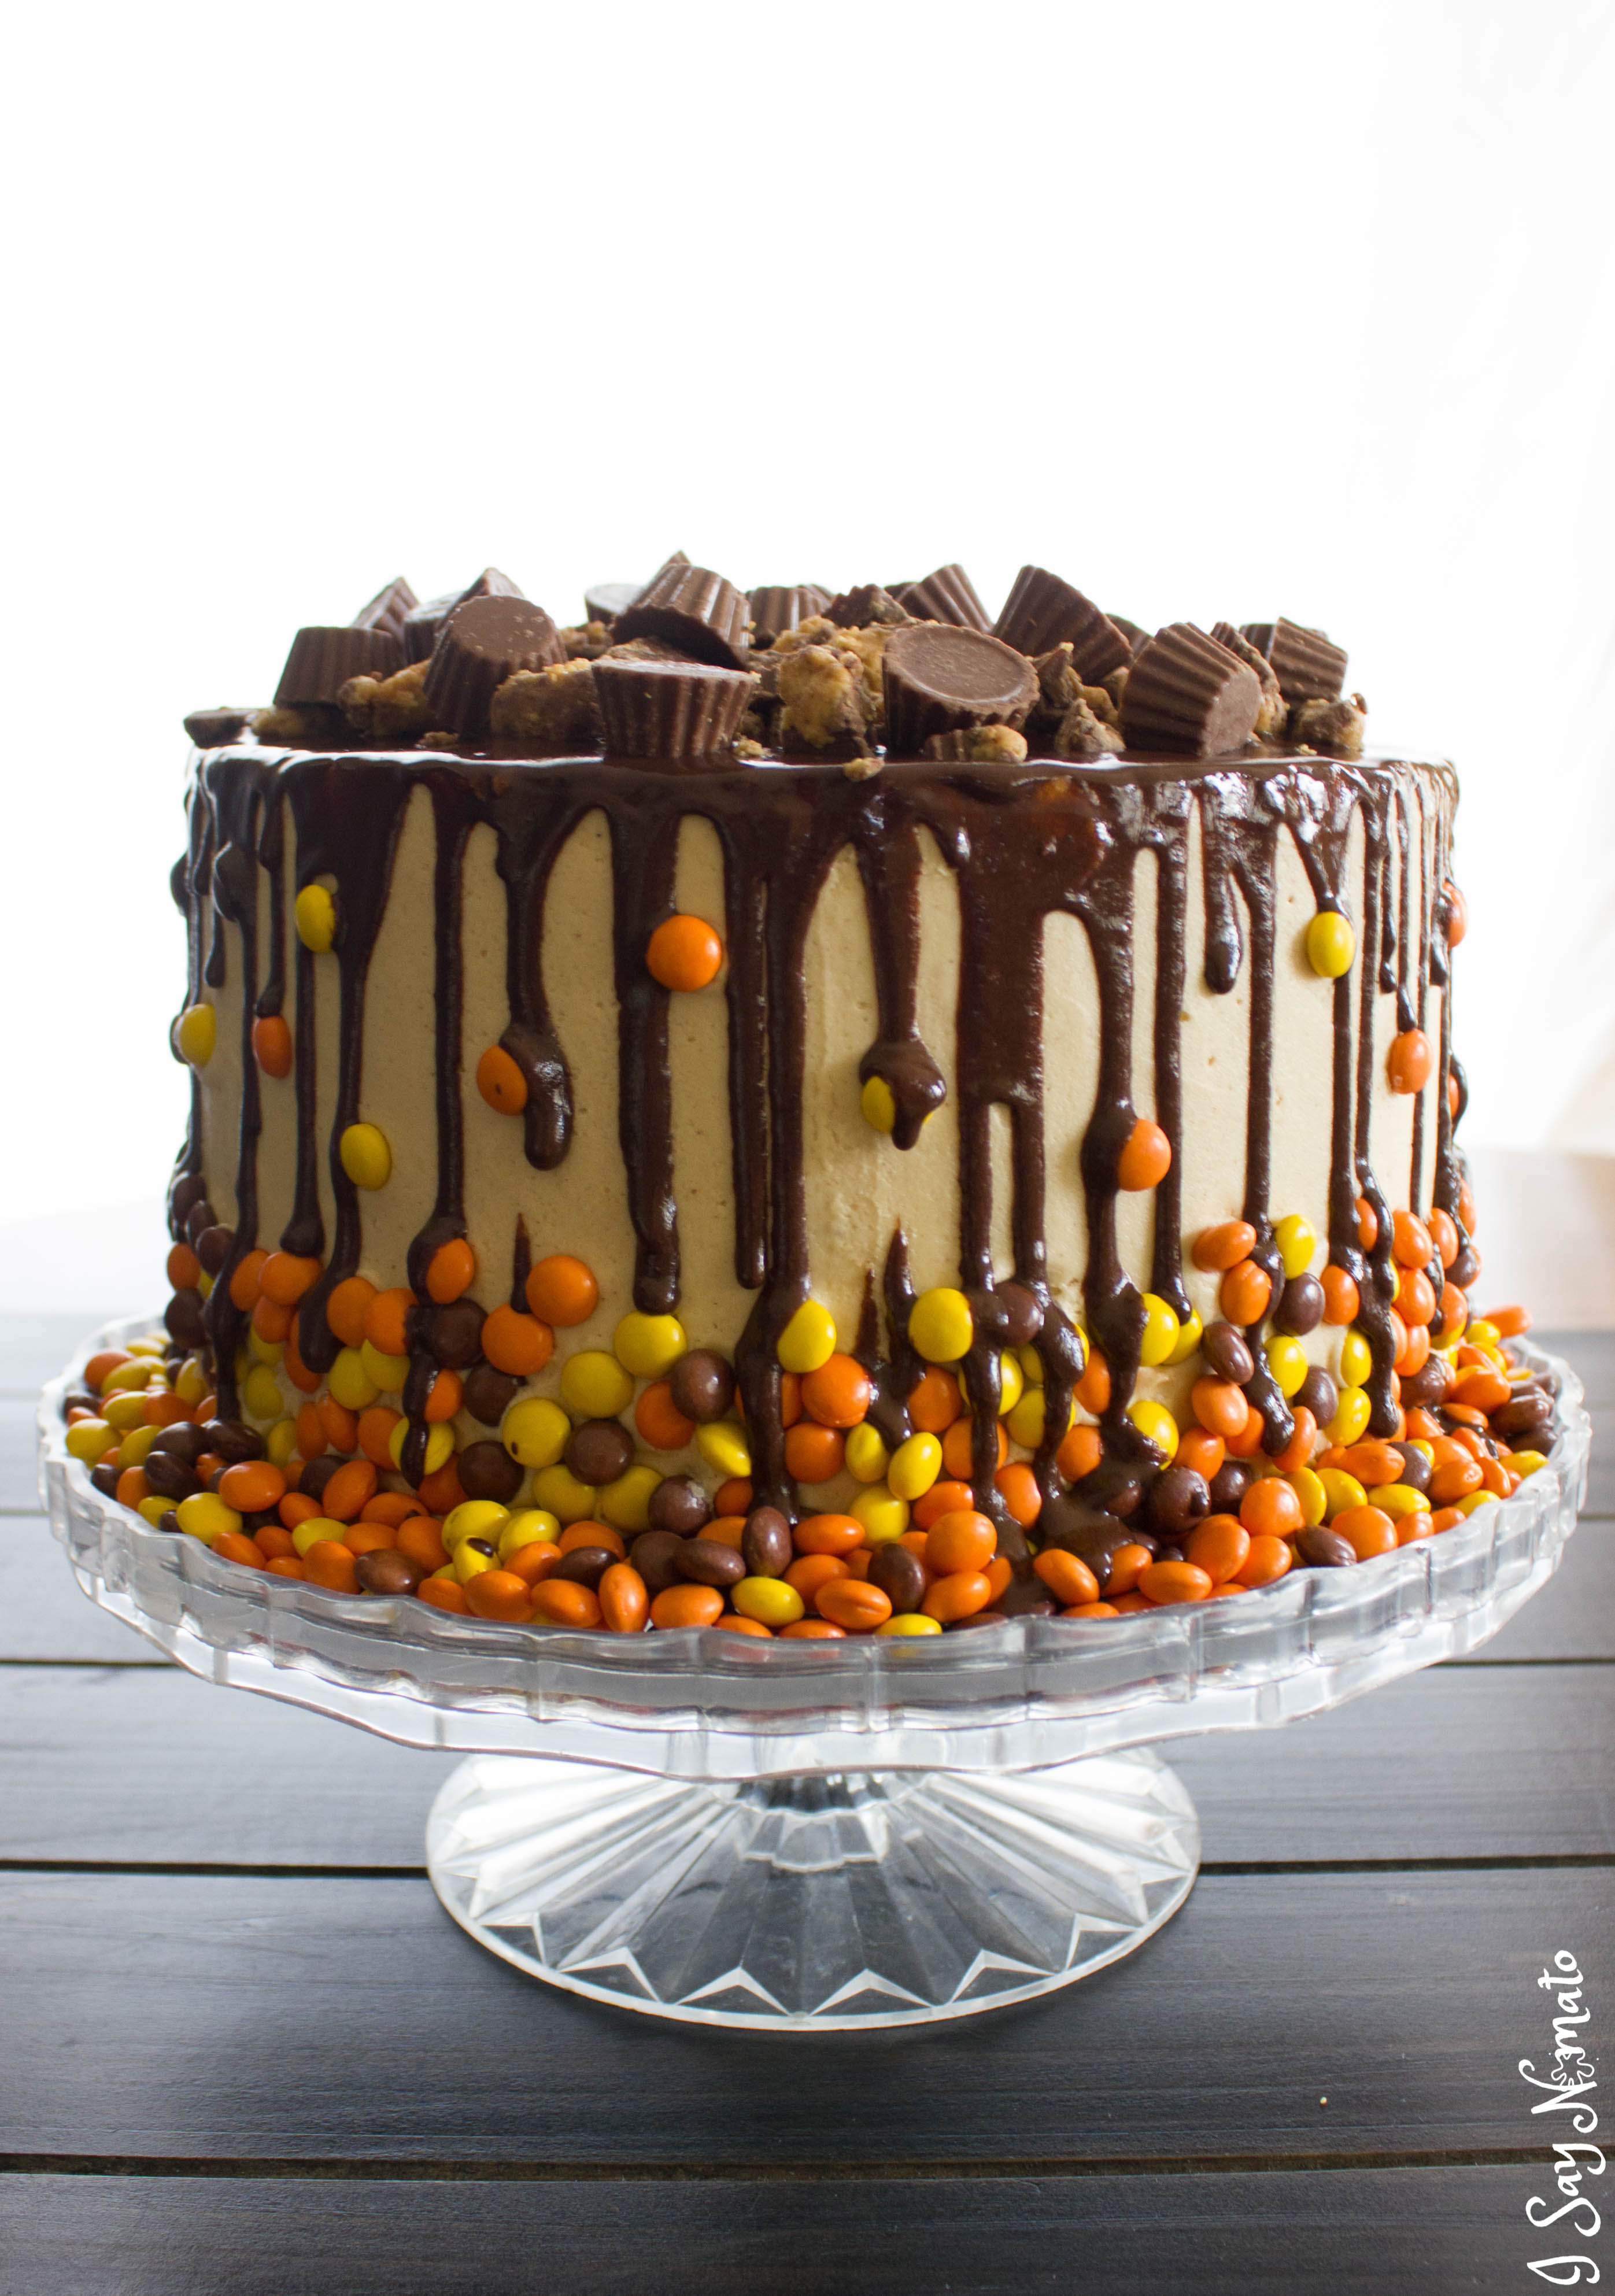
Now the ganache! The most basic recipe is 1:1 cream and chocolate. I’ll be honest, the ganache was kind of a disaster. It separated and was oily and strange, but I fixed it by just adding a tablespoon of warm milk. It transformed into smooth chocolate with the perfect texture.
Let that ganache cool for at least ten minutes, or until the pot is room temperature, stirring every once in a while. You want it to be thick enough to get those gorgeous drips, but thin enough that it, y’know, drips!
Spoon it onto the centre of your cake, and using a small spoon or metal spatula, work it gently over the edge. There are tons of videos on how to do this online, but this one from Renee Connor is my favourite!

Dat drip…

And then place the rest of your candies. I mixed some crumbled Reese’s Peanut Butter Cups with some of the smaller cups to give it more of a random look.
And voila! There you have it! The most ridiculous chocolate and peanut butter drip cake in all existence.
All I can say is, thank God for Bulk Barn!
I didn’t want to cut into it until the party, so here’s my slice! Please excuse the awful lighting and whatnot, I just wanted to show you the layers! Delicious delicious layers….
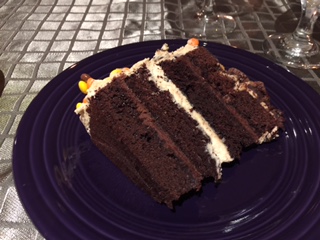
This cake was by far one of the best I’ve ever made in my life.
It was completely rich.


I could have this for every birthday!
Don’t forget that it’s I Say Nomato’s Birthday Week! Enter below to participate in our awesome GIVEAWAY! Due to Canadian laws you must answer the mandatory ‘skill testing question’ before you are able to enter the draw. Don’t worry, it’s simple 🙂
a Rafflecopter giveaway
- 1 2/3 cups all-purpose flour or 2 cups cake flour
- 1 1/2 cups white sugar
- 2/3 cups cocoa
- 1/2 cups vegetable oil
- 1 1/2 cups buttermilk (OR 2 Tbsp vinegar in 1 1/2 cups milk)
- 1 1/2 tsp baking soda
- 1 tsp salt
- 1 tsp vanilla
- 2 eggs
- 1 cup unsalted butter
- 3-4 cups sifted powdered sugar
- 1/4 tsp salt
- 1 tbsp vanilla extract
- 3-4 Tbsp milk or heavy cream (I always use cream with this recipe!)
- 1 cup smooth peanut butter
- 1/2 cup melted semi-sweet chocolate
- 1/2 cup cream
-
Preheat oven to 350°, and grease and flour four 8 1/2 inch round pans (or two pans twice!)
-
Mix all of the cake ingredients together in the order they're listed on medium first, scraping the sides occasionally. Then turn it up to high and let it go for 3 minutes, scraping occasionally.
-
Pour into your pans, and pop in the oven for 30-35 minutes, or until a toothpick inserted in the centre comes out clean. LET COOL COMPLETELY AND I MEAN COMPLETELY BEFORE YOU TAKE THE CAKE OUT OF THE PANS. I'm serious here. It should take about 45mins to an hour.
-
Mix all ingredients together, scraping the sides occasionally. The peanut butter will make the buttercream stickier, so you may have to add a little more powdered sugar. This needs to be very easy to spread, so make sure the frosting isn't stiff at all. Add a little more cream if necessary.
-
Level your cakes. There are many tutorials online, but you want to make sure they are FLAT.
-
Using a spatula, distribute about 1/2 cup of frosting between each layer of cake. Make sure it's level before adding the next level directly on top.
-
Frost the outside of your cake with a very thin layer of buttercream to lock all those crumbs in!</span>
-
Pop it in the fridge or freezer for about 30 minutes to harden the crumb coat and seal those in. We don't want any crumbs on our final product!
-
Bring it out of the fridge or freezer and frost the rest with a nice thick layer of buttercream.
-
Pop back in the fridge or freezer for another 15-20 minutes.
-
In a pot on the stove, SLOWLY heat the chocolate and add the cream, stirring frequently. You don't want it to boil at any point, or for the cream to curdle. If your ganache separates (like mine did), just add a tablespoon or two of warm milk, works like a dream! You'll know it's done when it is smooth and creamy!
-
Set that aside to cool for at least ten minutes, or until the pot is cold to the touch. The ganache needs to be pretty thick, but still liquid enough to drip!
-
Using a spoon, drop the ganache in the centre of your cake, gently spreading outwards with a spoon or spatula juuuust to the edge, then slowly coax it over the side. Do this all around the cake.</span>
-
Sprinkle with treats all over the top!
If you wanted to have cocoa buttercream in place of, or in addition to the peanut butter buttercream (peanut buttercream?), just add 1/2 cup of cocoa instead of the peanut butter.
Want to see a couple more recipes like this one?
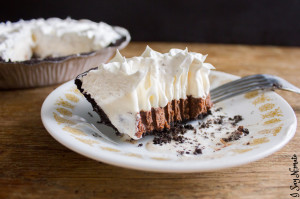
Peanut Butter Pie with Sea Salt and Chocolate Ganache
White Chocolate and Caramel Drip Cake

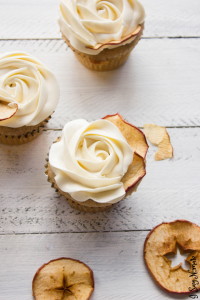
Apple Cider Cupcakes with Swiss Meringue Buttercream
Nutella and Creole Cream Cheese Ice Cream Pie